Discover how to create product catalogs automatically with a practical guide that will dramatically speed up your content creation workflow
There are parts of even the most creative jobs which are, let’s be honest, downright dull. Many creative professionals waste time and energy completing these mundane-yet-necessary tasks every day. Wouldn’t it be nice if there was a smarter way to tackle repetitive tasks? If humankind can land a rocket on a spinning asteroid, shouldn’t we be able to speed up our workflow to leave more time for creative work?
We believe that one possible solution to the problem is V-Ray Cloud. Not only does V-Ray Cloud make access to render power simpler and faster for everyone, but it can also revolutionize your day-to-day workflow to leave more time for the tasks that you genuinely enjoy. What’s more, you don’t need a degree in rocket science to use it (though, rocket scientists are also welcome to try).
How to create a product catalog using V-Ray for Rhino and V-Ray Cloud?
The purpose of this article is to provide you with a clear guide on how to automate a typical scenario that product designers often face: creating a product catalog.
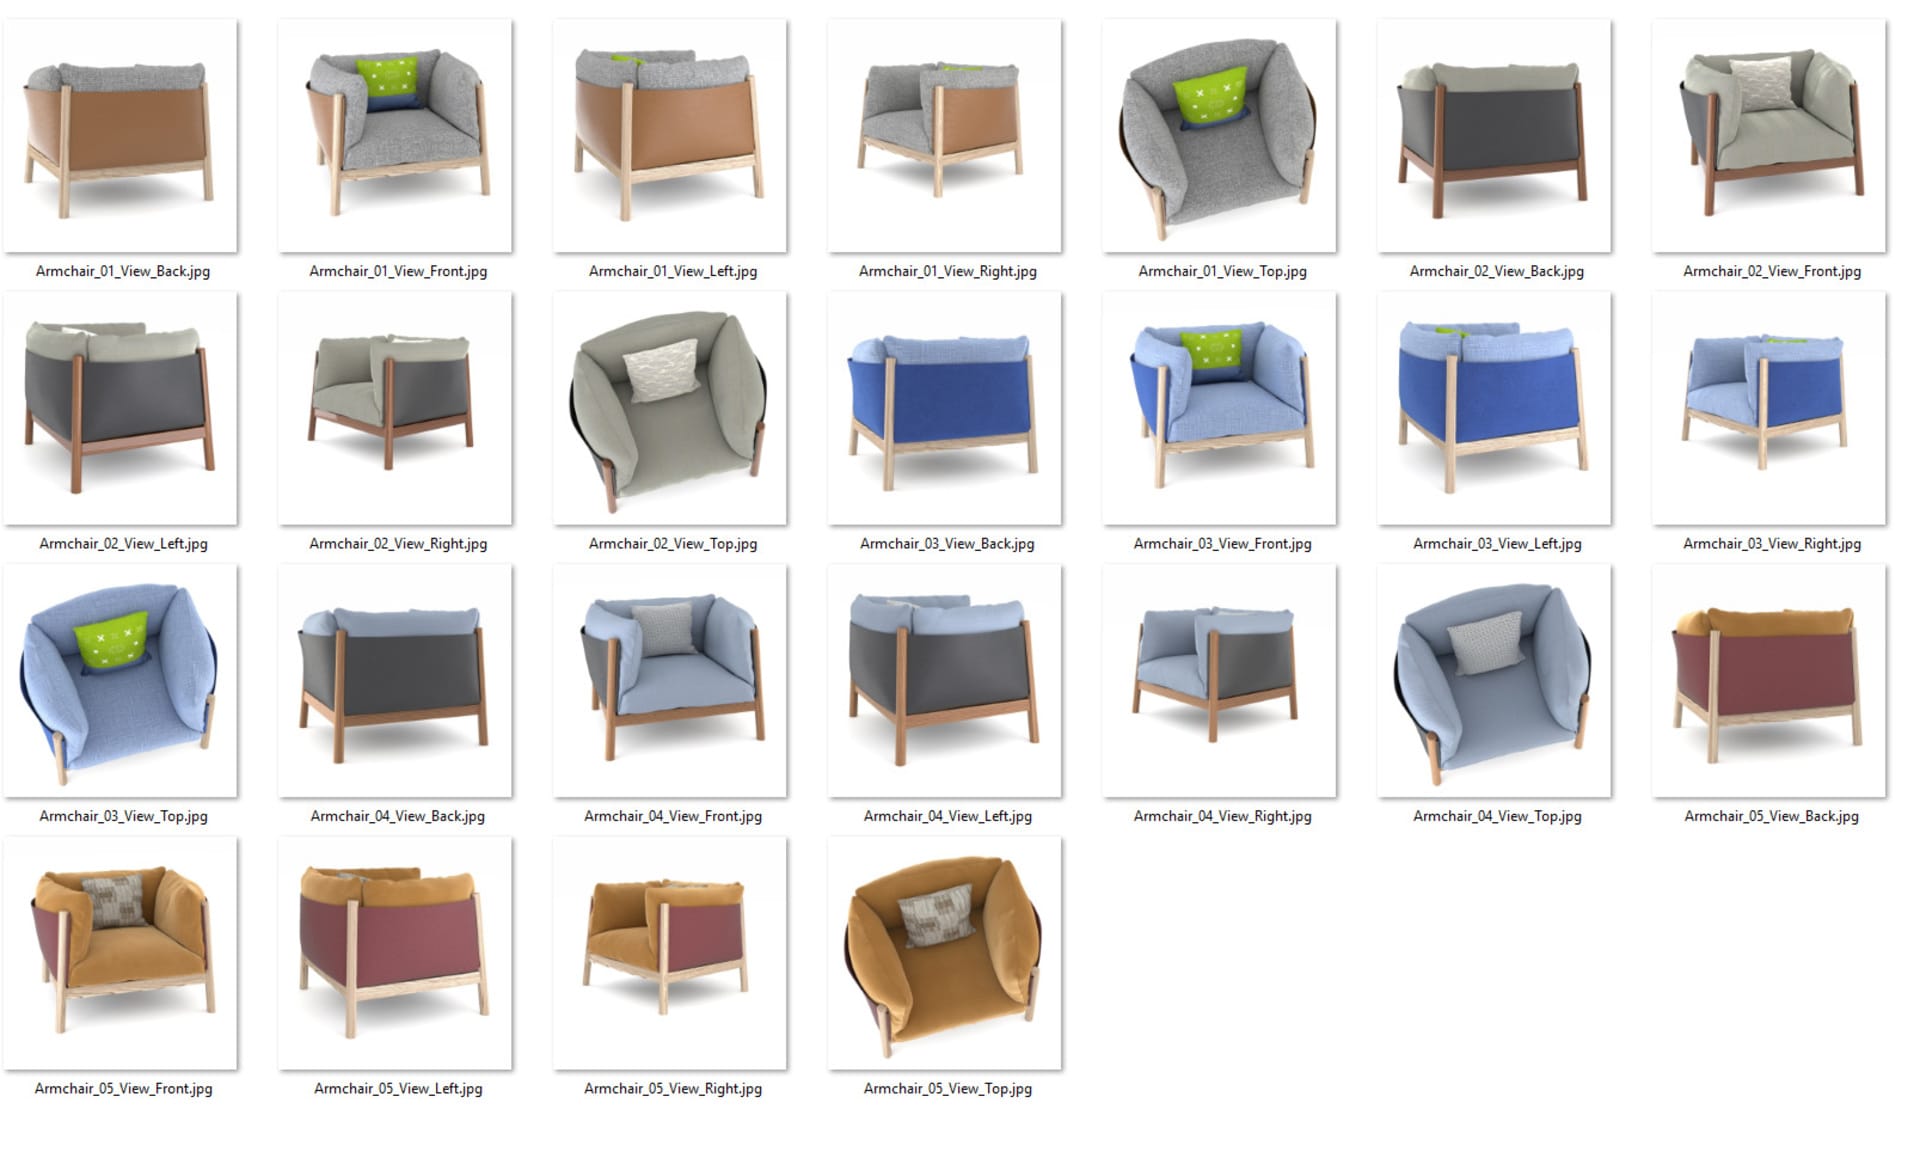
Imagine you've poured your heart and soul into your work to create a beautiful collection of modern furniture — and you win the project! The client now wants you to create all the images for their online shop and print catalog; that’s five views of each product — front, back, left, right, and top — and in HD resolution. Did you have weekend plans? Think again...
But, you can get your weekends back. V-Ray Cloud can come to your rescue with the magic of automated workflows. This three-step tutorial will show you how to start working smart with the help of automated scripts and the command-line interface of V-Ray Cloud.
Take advantage of ready-to-use automation scripts with our step-by-step guide
"Testing V-Ray Cloud has been yet another task on my list, but after playing with it for a while, it became a part of my daily design workflow," says Ivan Kozaliev, 3D Artist at Chaos Group. "That is how the idea for this guide came to life. It is great to be able to share my time-saving tips with fellow artists. The Cloud is the future, so why not be among the first to embrace it and profit from its benefits in our daily work?"
The detailed guide and scripts, created by Ivan Kozaliev, are available to download for free.
Need more convincing? Here is a brief overview of what's included in Ivan’s step-by-step guide:
Step 1: Set up your models as V-Ray scenes
Create a simple scene for each one of the products on a white background, or as needed for your catalog, and then export it as a .vrscene. You only need to create one scene for each product. Unfortunately, we cannot automate the design process for you, but this guide shows how to automate everything else you need to do to create multiple views of a product, and then render them in various resolutions.
Step 2: Create the required views of your products – automatically
Based on your specific catalog and creative needs, set up all views (front, back, left, right, top) of just one of the products that you want to include in your catalog. We've created a script that uses those sample views to automatically generate all the necessary views for all products from your catalog. The script will work correctly for all products about the same size. For example, views created for just one of your chairs will work for all of your chairs, armchairs, bedside tables, and so on.
Step 3: Submit auto-generated scenes to V-Ray Cloud – with one command
Now that you have generated all the views of all of your products automatically, it is time to render them. This process can be automated, thanks to V-Ray Cloud's command-line interface. You don't need need to be a programmer to do it — we've included the script with the guidе — just copy and paste it. You can also use the script to render both the thumbnails that you'll need for your website catalog and the full-size images. Once the render jobs are complete, just hit Enter and all the images will download into the respective folders.

V-Ray Cloud is still in beta — and we are continually improving it. We're expanding the feature set to bring the power and productivity of cloud computing closer to you until it blends seamlessly into your modeling software of choice. Here is what Konstantin Gaytandzhev, Product Manager for V-Ray for Rhino, Revit, and SketchUp has to say about it:
"Remote offline rendering, which is the workflow we're showcasing in this article, is just one of the many practical uses of V-Ray Cloud as part of a typical design workflow. Soon, we'll be rolling out features that utilize V-Ray Cloud to speed up your design work — not just your rendering. My focus is to find a way of merging our cloud service with our products to help you visualize anything you can imagine and in a way you never imagined possible."
Put V-Ray Cloud to the test with your creative projects: www.chaosgroup.com/cloud.
Download our free guide
If you don't see the form above, try disabling your ad-blocking software.


