We’ve added new Lighting Analysis tools in V-Ray Next for 3ds Max to help you measure and analyze the light levels in your scene. You’ll be able to create false color heat maps and data overlays to show luminance (in candelas) or illuminance (in lux) values.
Lighting analysis in V-Ray Next uses two components: the VRayLightMeter helper object and the VRayLightingAnalysis render element. Though the VRayLightMeter helper object has been in V-Ray since version 2.0, it’s been updated in V-Ray Next for better precision. The VRayLightingAnalysis render element is new in V-Ray Next.
Using the VRayLightMeter helper
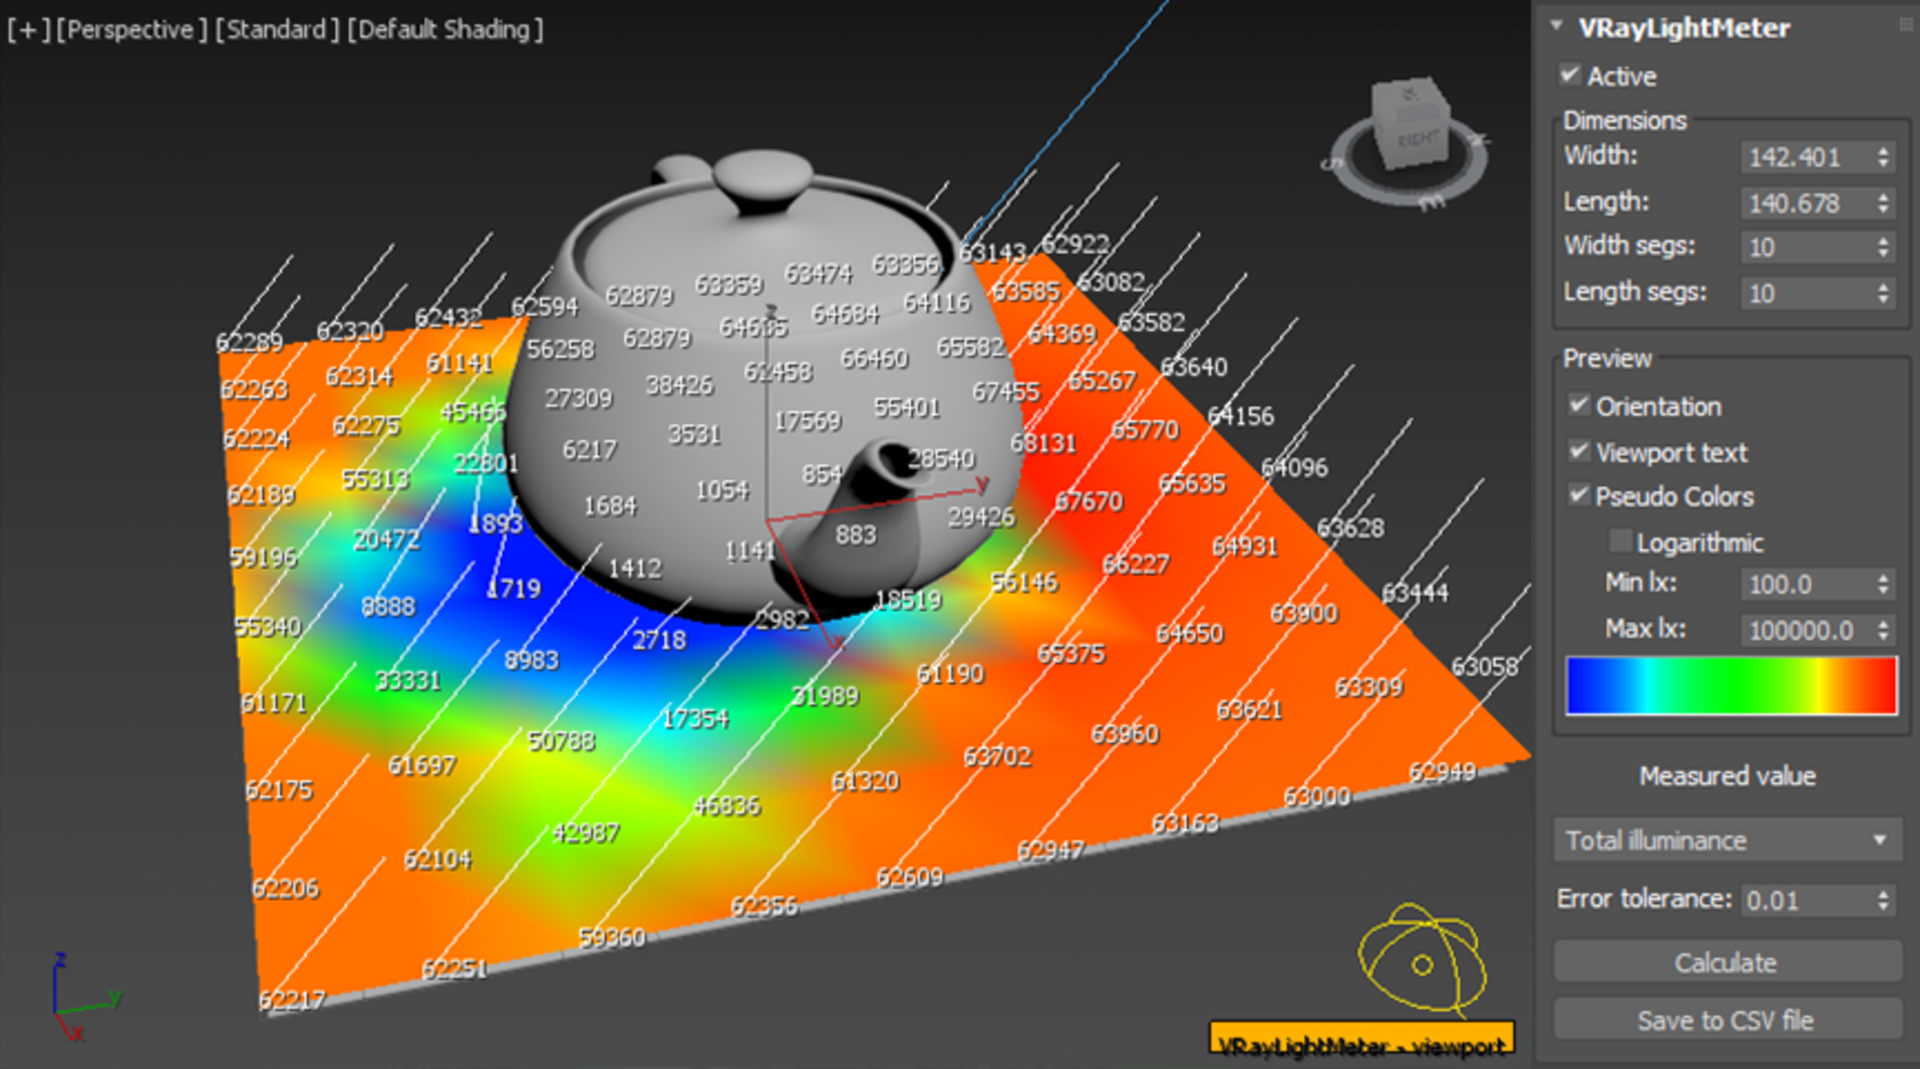
The VRayLightMeter helper is a rectangular grid that shows illuminance values at the vertices of the grid. It can show total illuminance, direct illuminance, indirect illuminance and daylight factor. It can also show the primary direction of where the light is coming from.

LEFT: VRayLightMeter in the 3ds Max viewport showing pseudo colors, light orientation and textual illuminance values.
RIGHT: VRayLightMeter interface in the 3ds Max command panel.
To display the light meter values, first you need to hit the Calculate button or use the Maxscript calculate() method. (V-Ray doesn’t automatically recalculate light meter values during regular image rendering.) Precision can be controlled by setting the Error tolerance value. Higher values calculate faster, but the results may be noisier.
Internally, V-Ray calculates light meter values in several passes using its light baking mechanism. This includes four baking passes: one to collect the main illuminance data, two to determine the predominant light direction, and a final pass to calculate the daylight factor. To ensure the correct results (comparable to radiosity methods with a sufficient number of light bounces) V-Ray automatically overrides its render settings and calculates global illumination using a combination of brute force and light cache.

Progress window showing the current pass.
V-Ray does not yet have a Lighting Analysis control panel. If you need to set the min/ max values for all VRayLightMeter helper objects in the scene, you can use the following Maxscript function:
      fn setVRayLightMetersScale fmin fmax logarithmic = (
  local lightMeters=getClassInstances VRayLightMeter
  for lightMeter in lightMeters do (
    lightMeter.min=fmin
    lightMeter.max=fmax
    lightMeter.log=logarithmic
  )
)
The following MaxScript function can be used to calculate all active VRayLightMeter helper objects in the scene:
      fn calcAllVRayLightMeters = (
  local lightMeters=getClassInstances VRayLightMeter
  for lightMeter in lightMeters do (
    if lightMeter.active then lightMeter.calculate()
  )
)
Using the VRayLightingAnalysis render element
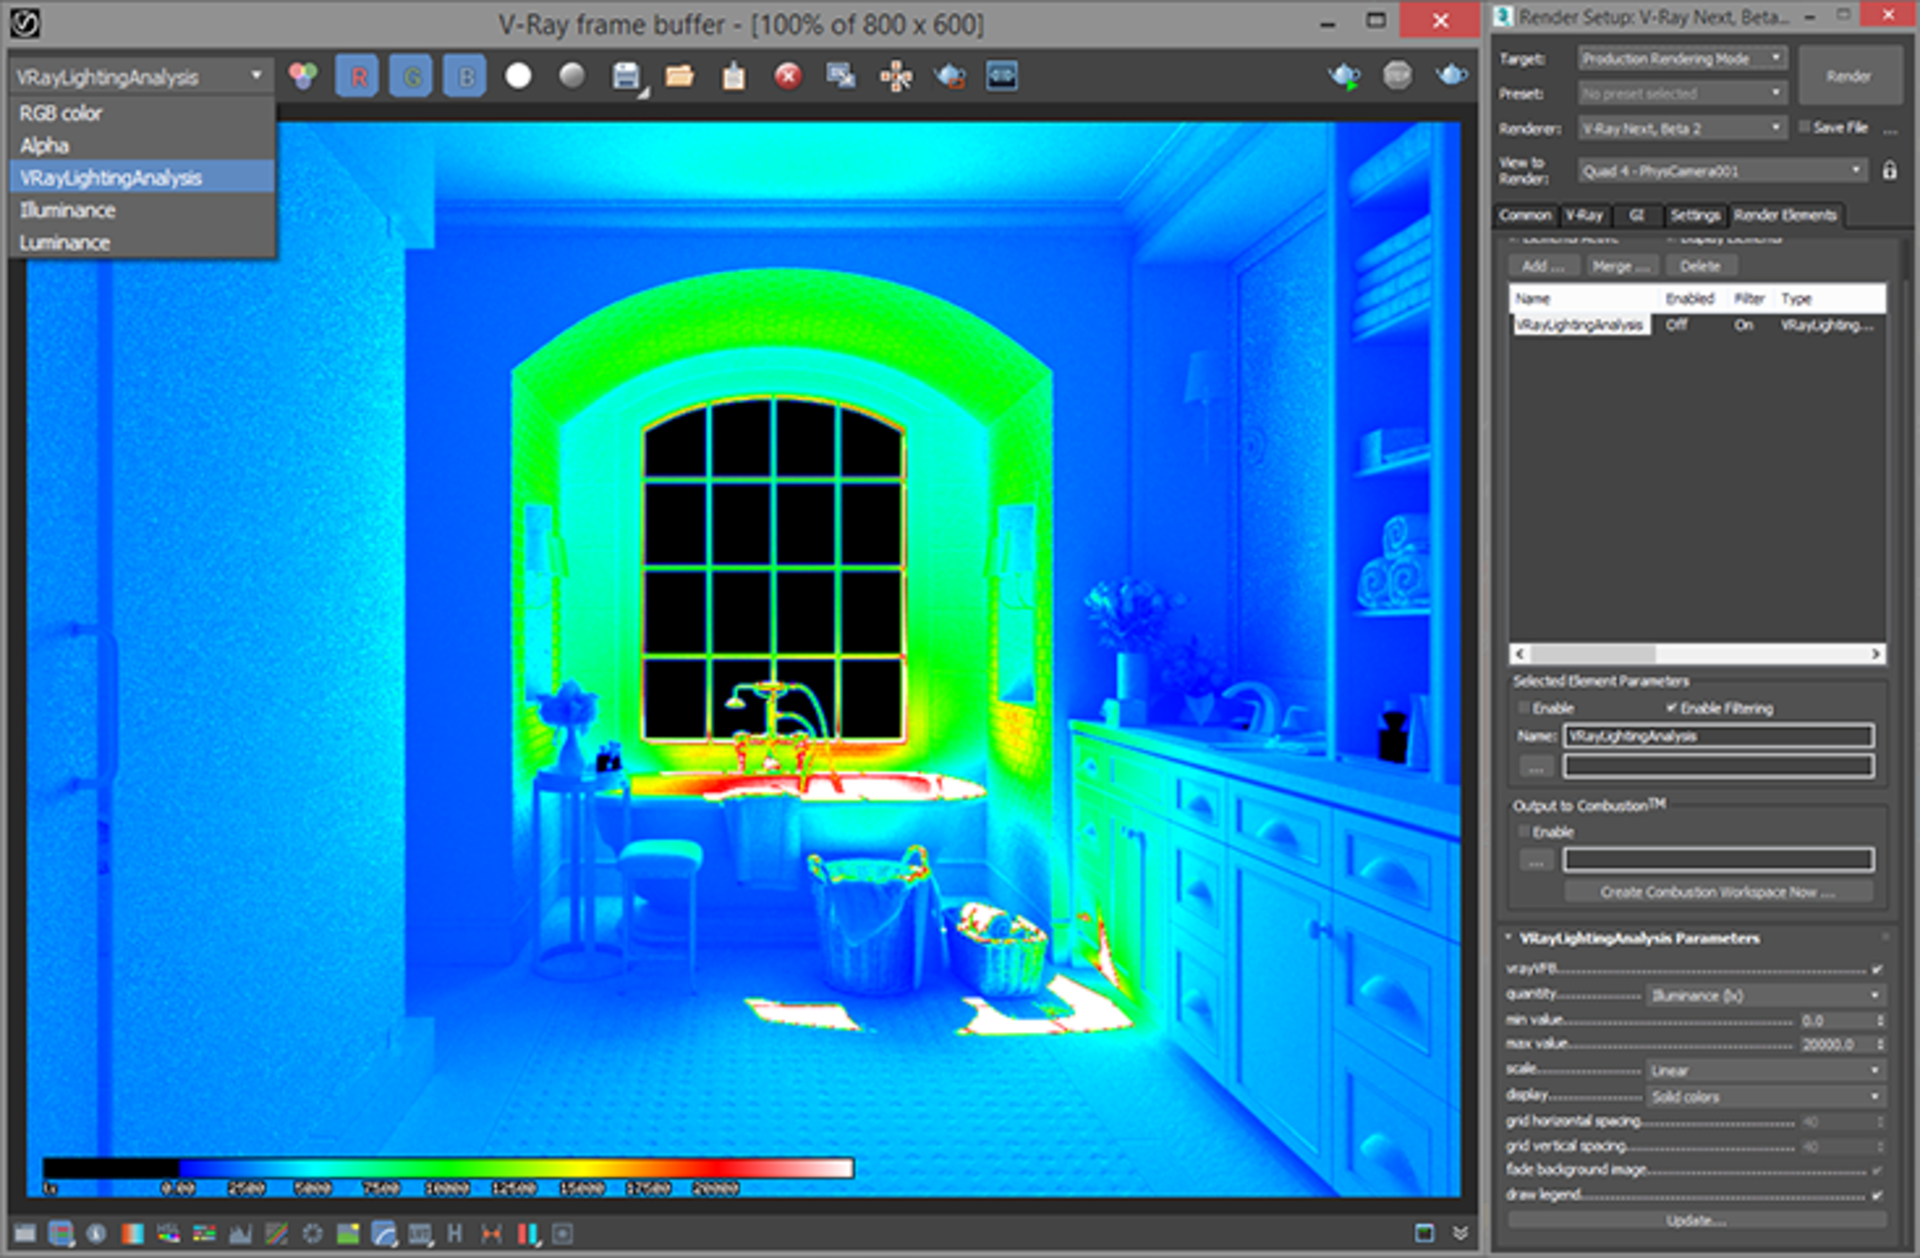
VRayLightingAnalysis is a unique render element. In addition to its own render element, it adds two more render elements to the V-Ray frame buffer, which show the absolute, unscaled Illuminance (lux) and Luminance (candelas) values. The VRayLightingAnalysis render element can be added from the renderer settings.

LEFT: VRayLightingAnalysis render element in false color mode after a render is complete.
The additional Illuminance and Luminance render elements can be seen in the V-Ray frame buffer as well.
RIGHT: VRayLightingAnalysis render element interface.

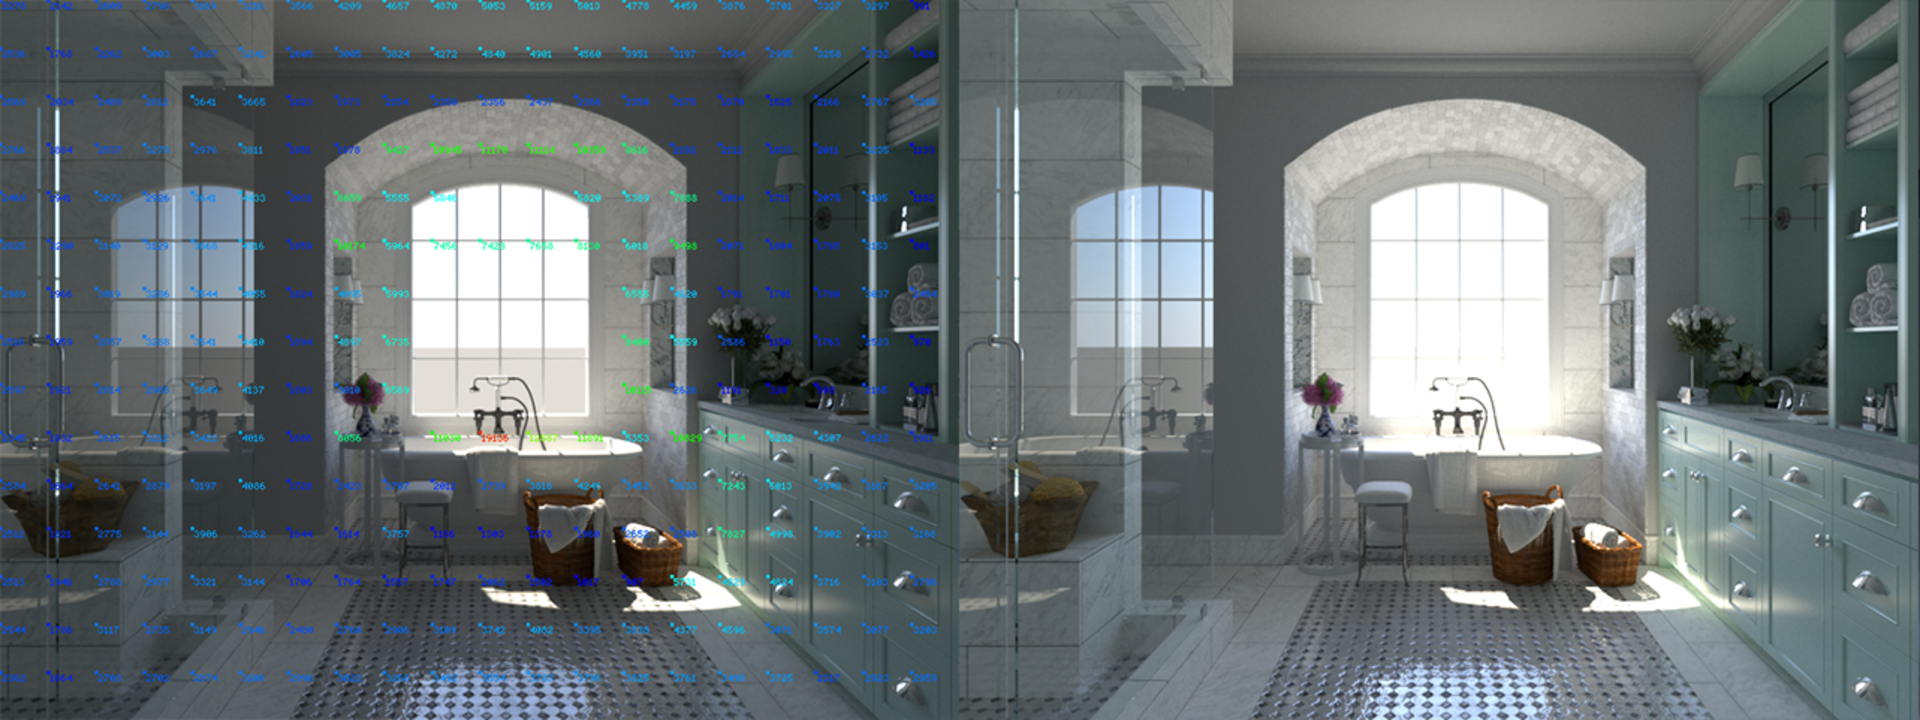
LEFT: VRayLightingAnalysis with illuminance values overlaid on a grid over the original image.
RIGHT: Original RGB rendering.
The VRayLightingAnalysis render element is a post-effect and is only updated once the rendering is complete. After the render is complete, most VRayLightingAnalysis settings can be adjusted without having to rerender. Simply change the setting and press the Update button.
When using the same settings (min/ max and scale type) as the VRayLightMeter, the results should be the same for the total illuminance.
Illuminance values shown over glass and mirror objects represent the illuminance on its surface, not the surfaces that are seen through the glass or in the mirror. Because these materials do not reflect light diffusely, V-Ray computes these illuminance values with very low precision — or it may even skip the illuminance calculations completely. Therefore, these values may be quite noisy or even zero.
To ensure correct results, it’s recommended to use the default V-Ray GI settings, with increased light cache subdivs (e.g. 2000) and a higher light cache retrace threshold (e.g. 4.0).
Converting previous 3ds Max lighting analysis scenes
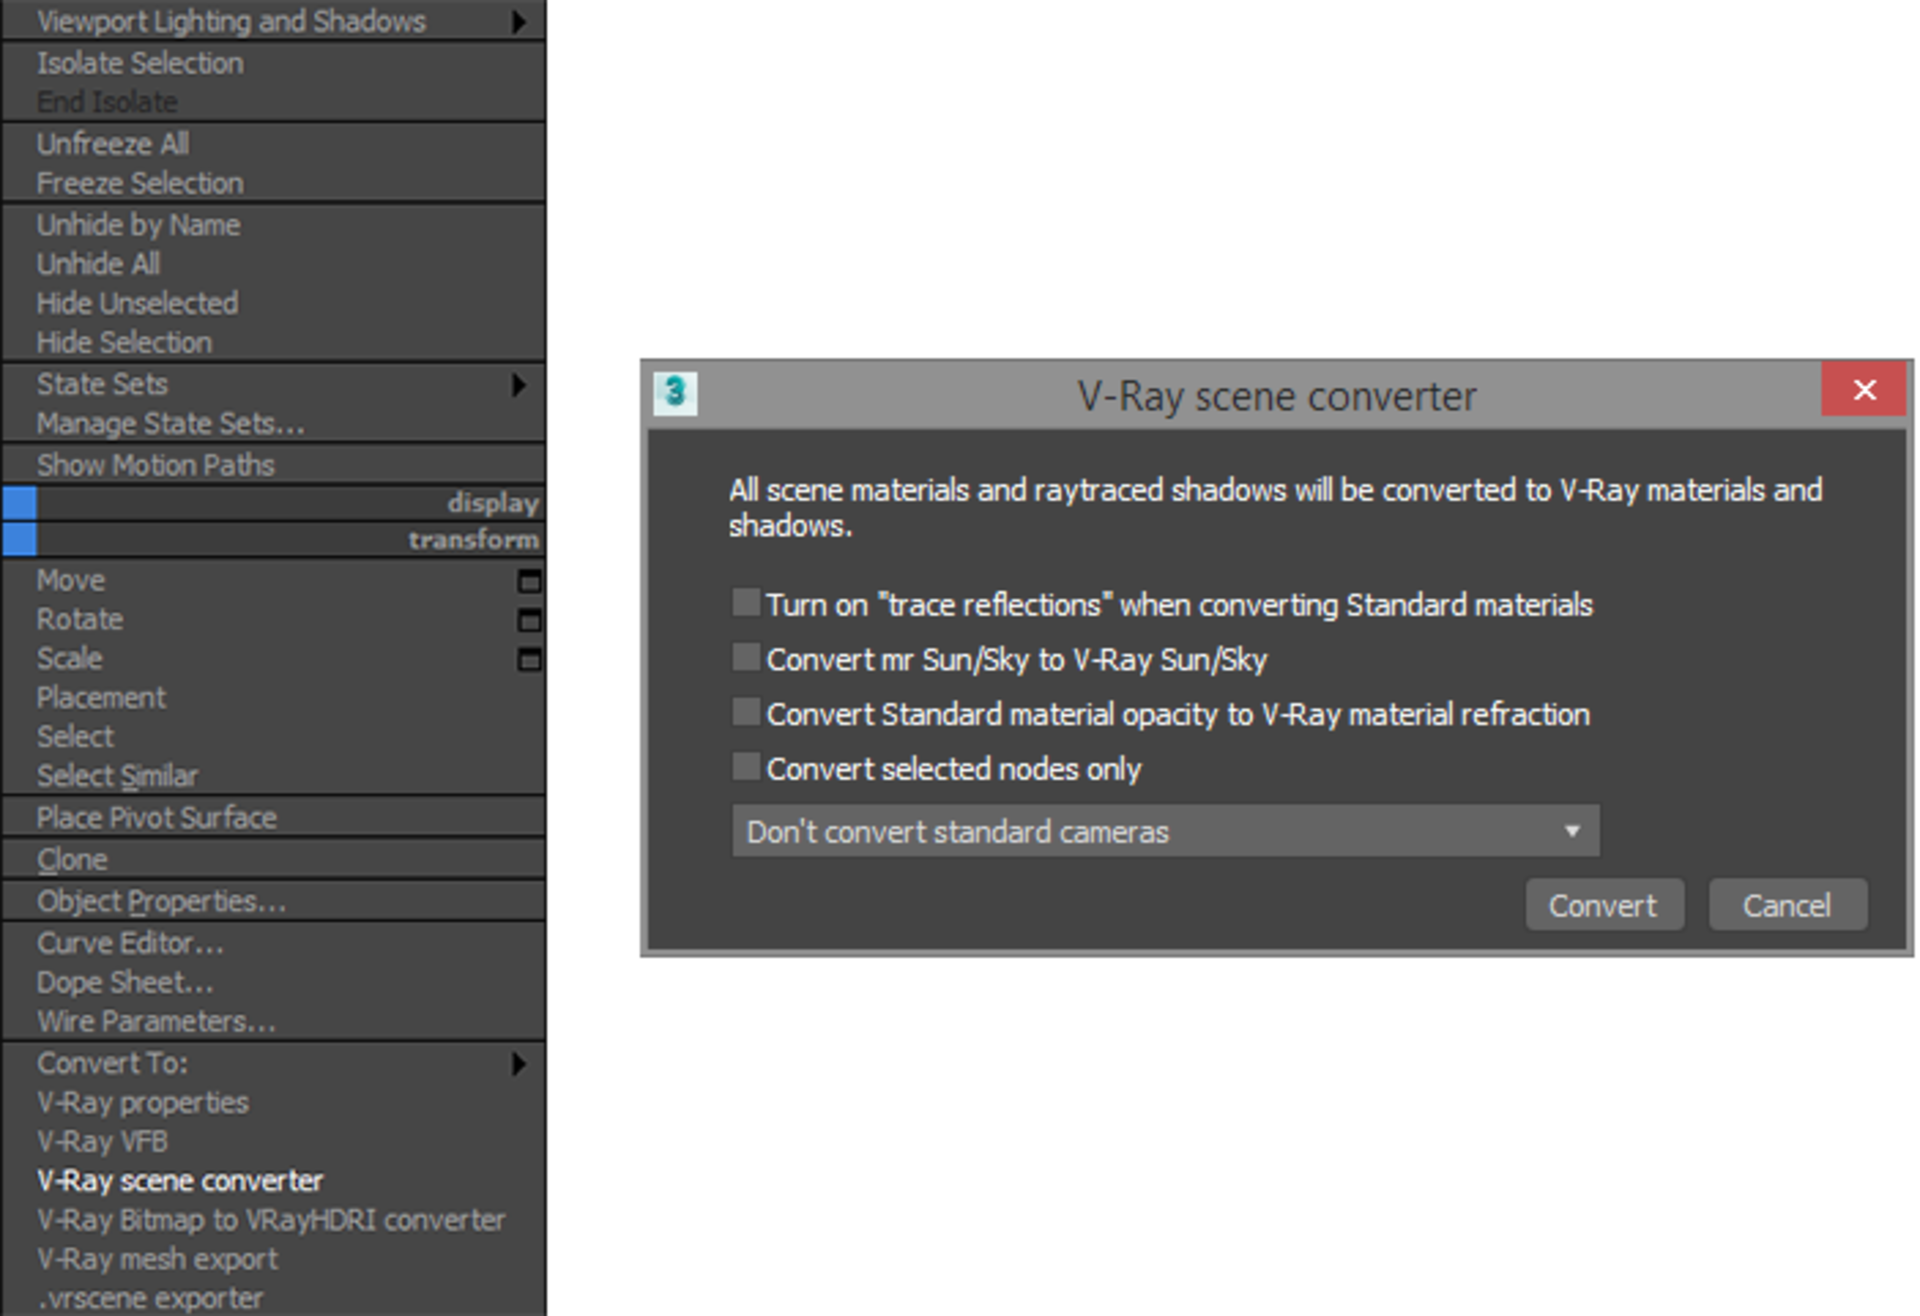
There are two ways to convert your existing 3ds Max scenes and lighting analysis components to V-Ray equivalents. One method is using the 3ds Max Scene Converter tool. The other method is to use the V-Ray scene converter script that’s included with V-Ray Next. Both tools can convert 3ds Max Light Meter objects and Lighting Analysis Overlay render effects, as well as other scene components, into their respective V-Ray equivalents. To select the V-Ray scene converter, right-click in any 3ds Max viewport. (Make sure V-Ray is set as the current renderer.)

LEFT: Quad menu showing V-Ray scene converter. RIGHT: V-Ray scene converter dialog.
Conclusion
The new lighting analysis tools in V-Ray Next for 3ds Max offer a replacement for those that were previously included in 3ds Max. With the combination of the VRayLightMeter helper and VRayLightingAnalysis render element, you can accurately analyze and measure the light levels in your scene.


