V-Ray Next for Maya is considerably faster and more efficient than 3.6. Maya expert Stephen DeLalla reveals how he’s taken his workflow to the Next level.
With V-Ray Next for Maya, I can now utilize the viewport and GPU much more, as I can isolate specific areas of my scene with ease. As an instructor, when sharing V-Ray techniques with students or trainees, this offers an extreme advantage, allowing me to immediately isolate different pieces of geometry, lights and even specific nodes within a shading network just by clicking a button in the IPR.
The power to show how an object in your scene is being affected by a specific node in a shading network or light will not only increase the learning comprehension of look development in V-Ray and 3D as a whole, but will decrease troubleshooting and debug time — which is almost always half the battle when working in CG.
My new Next workflow
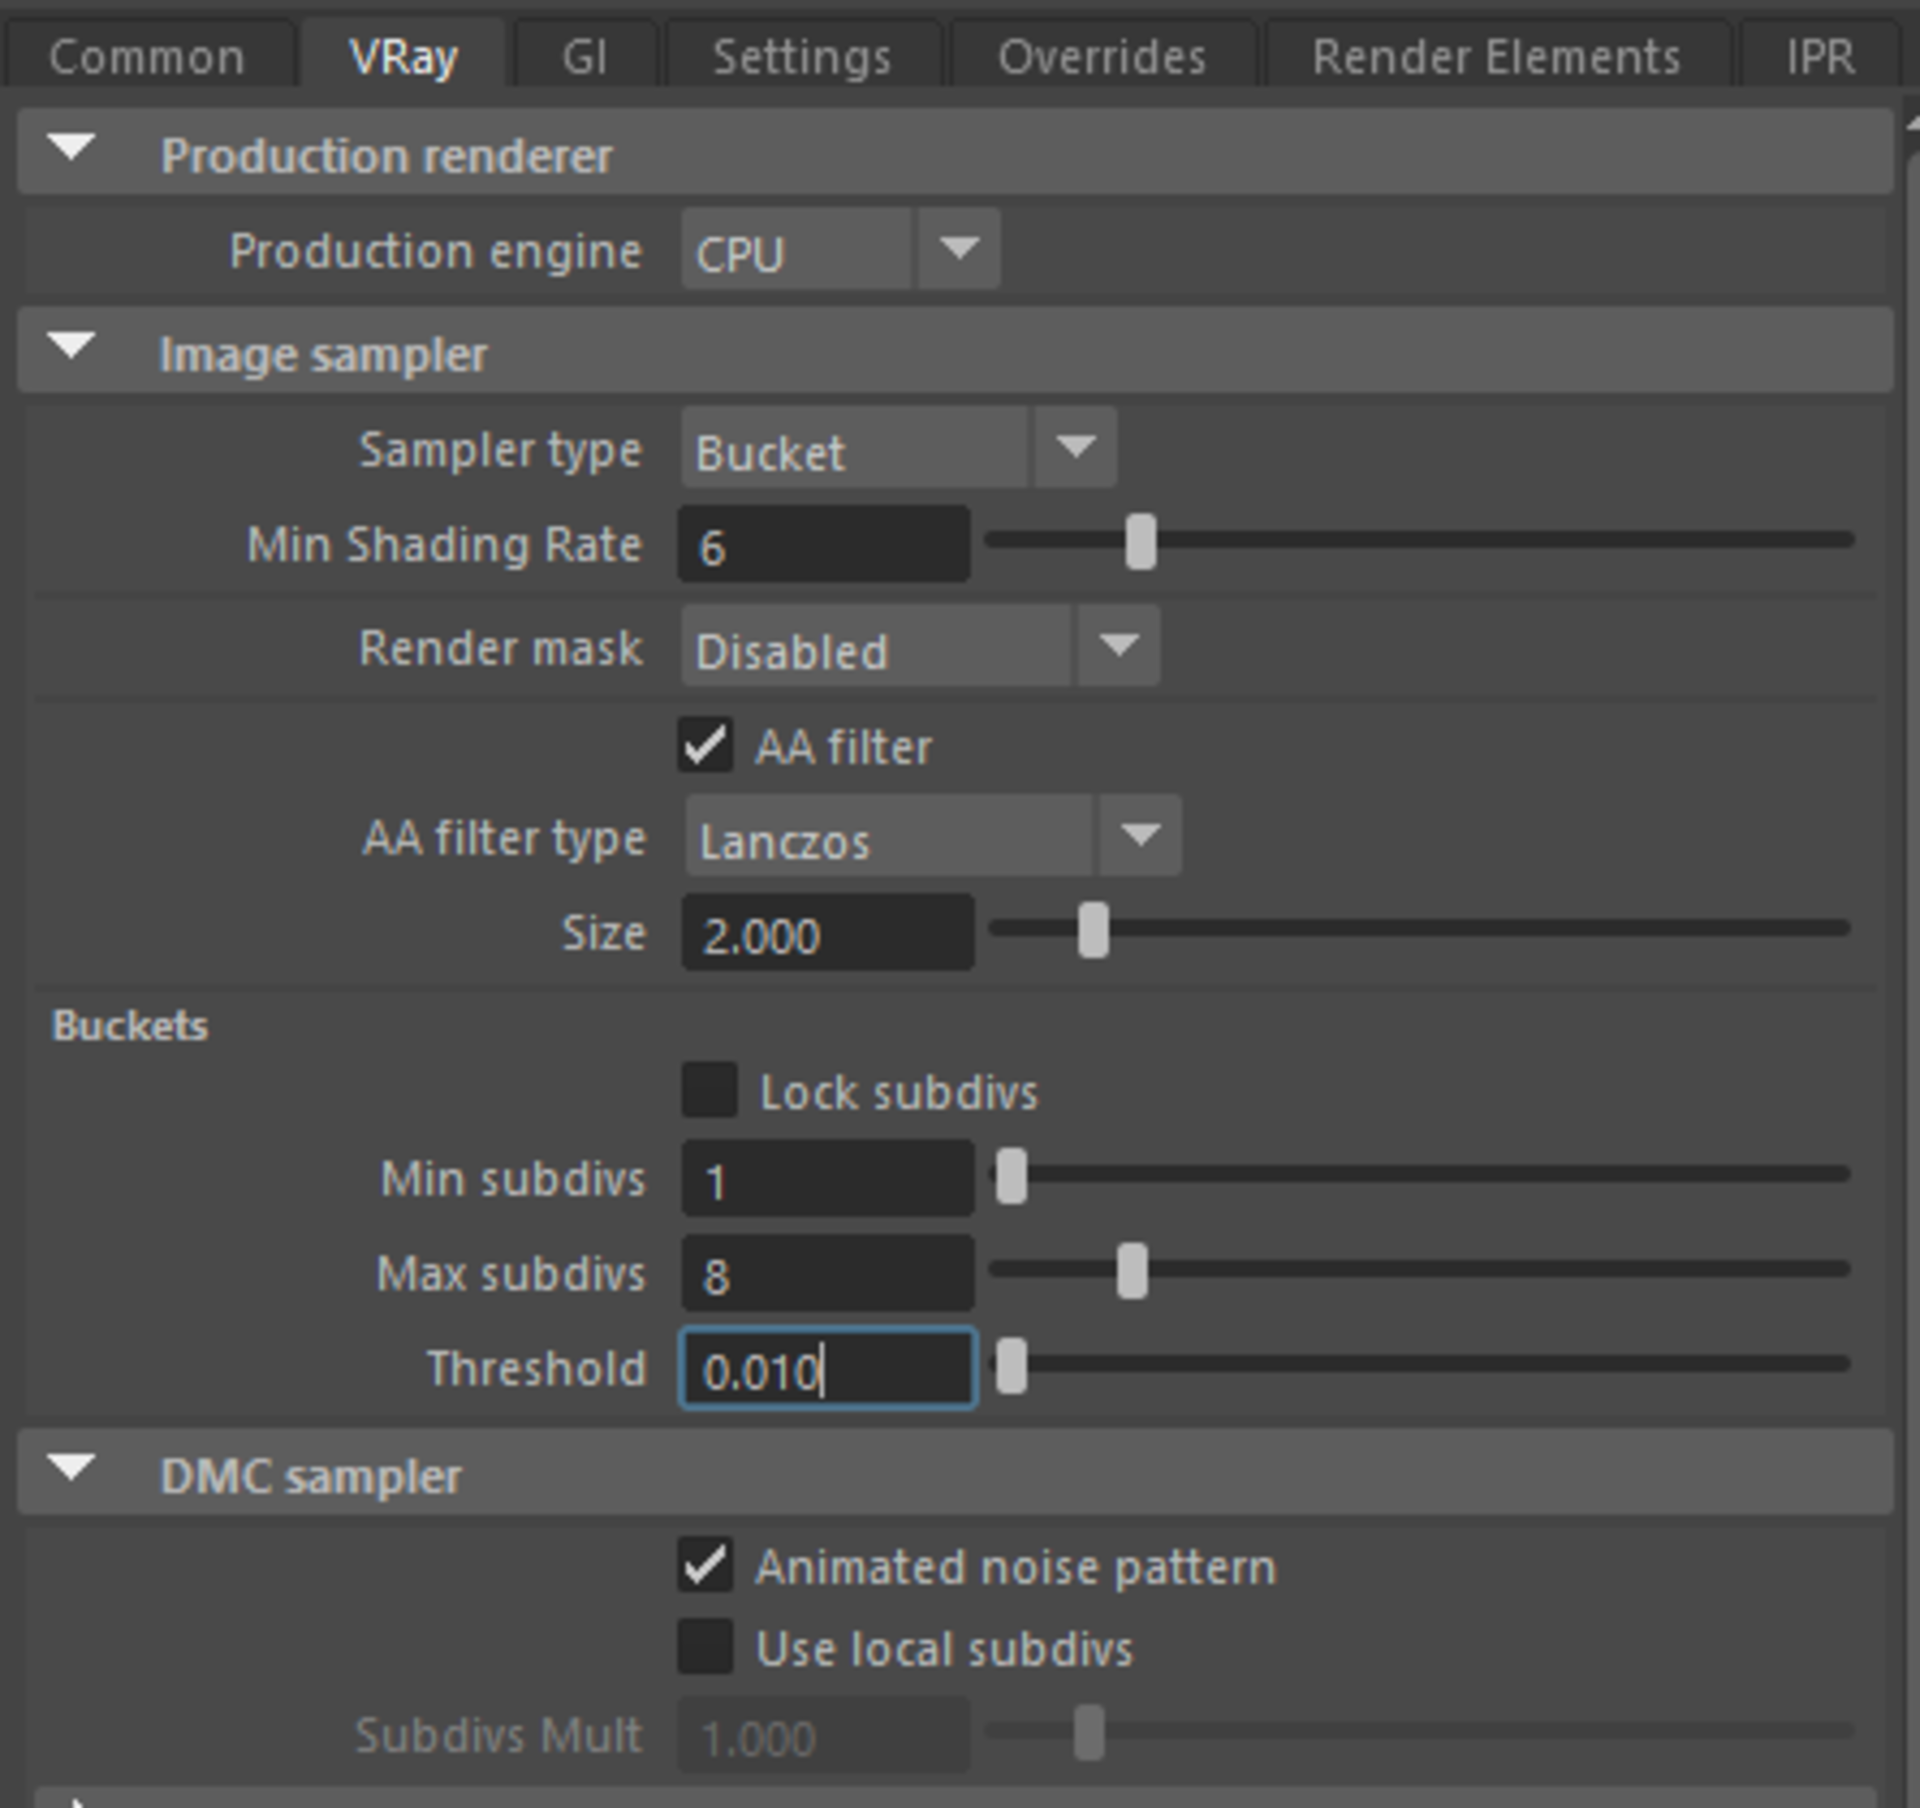
My rendering workflow is pretty simple. I begin with the default V-Ray settings and change the Color mapping to Linear multiply, with the following settings:

Once that’s done, I can establish a Max subdivisions amount based on my scene type. I start low — usually around 8 for most scenes — and use the sample rate element to analyze the quality of the image. The more detail and geometry, the higher it will need to be.
I gradually raise my Min Shading Rate until the areas of secondary rays are clean, leaving the Image sampler Threshold with my single quality settings. A value of 0.1 will give me a noisy-yet-fast render and a value of .01 will be close to the final.

For scenes with depth of field and motion blur, I change to a heavier AA sampling setup. I usually start with my Max subdivs around 24, but if there is a soft focus or a lot of blur, it can go as high as 100. This also means I can ease off the Min Shading Rate and have the renderer focus more on the anti-aliasing.
The main approach remains the same between versions and I still end up with the Image sampler Threshold controlling the overall image quality.
Here is the final render using V-Ray Next for Maya:

This environment was designed as a Monk training ground with evil undertones; the students of this school would not necessarily go on to do good.
And here, for comparison, you can see a shot of one of my earlier renders handled by V-Ray 3.6:

Whenever I’m working to move lights or dial in materials, I use the IPR exclusively in V-Ray Next for Maya. The dynamic geometry updates, as well as the different ways to isolate parts of your scene, are incredibly powerful.
The beauty of IPR
Whenever I’m working to move lights or dial in materials, I use the IPR exclusively in V-Ray Next for Maya. The dynamic geometry updates, as well as the different ways to isolate parts of your scene, are incredibly powerful.
In previous versions of V-Ray, I would need to hide lights or objects with display layers to isolate them but now I can do all of this by simply selecting them in the light lister. During look development, I can isolate certain parts of my shading network to help debug or see the result of my shading nodes.
Better results with fewer settings
V-Ray Next for Maya has progressed the evolution and simplification of my rendering workflow. I rely heavily on the Min Shading Rate and Max subdivs and stay out of a lot other render settings. I also keep local subdivs off almost all the time and can be confident that I will get a clean image with far less effort by dialing individual subdiv values.
In earlier versions of V-Ray, I used local subdivs and divided them, which made the workflow more intensive. You may accidentally leave a light or material setting too high and end up bogging down your whole scene. I often found myself experimenting with different adaptive amounts to try and get a faster render.
In V-Ray Next, it’s rare that I even need to dive into the advanced settings of the renderer. My workflow is significantly faster and simpler, which makes V-Ray Next a wonderful update.
About Stephen DeLalla
Stephen DeLalla currently works in the industry as a Lead Look Development Artist. As a former instructor at Gnomon School of Visual Effects, where he created the first V-Ray curriculum to modernize the lighting instruction at the school, Stephen is an expert in all things V-Ray. He is also the author of two instructional video series focusing on V-Ray for Maya, available through the Gnomon Workshop.


