Andrew Krivulya shares his tricks for luscious CG locks — and reveals how V-Ray Cloud has boosted his workflow.
When Andrew “Charly” Krivulya isn’t creating 3D tutorials for his YouTube channel, he grooms jaw-droppingly realistic hair, fur, and feathers with Ephere’s Ornatrix 2 for Maya. His virtual coiffures have graced characters in advertisements for Heinz, League of Legends video game cinematics, and idents for Saudi sports channel MBC.
Andrew is always looking for ways to improve his renders, and with Chaos Group’s dynamic duo of V-Ray Next for Maya beta and V-Ray Cloud he was able to upgrade his pipeline and produce super realistic imagery faster than ever before.
We joined Andrew for a quick chat on how Chaos Group’s new tech has improved his barbershop techniques.

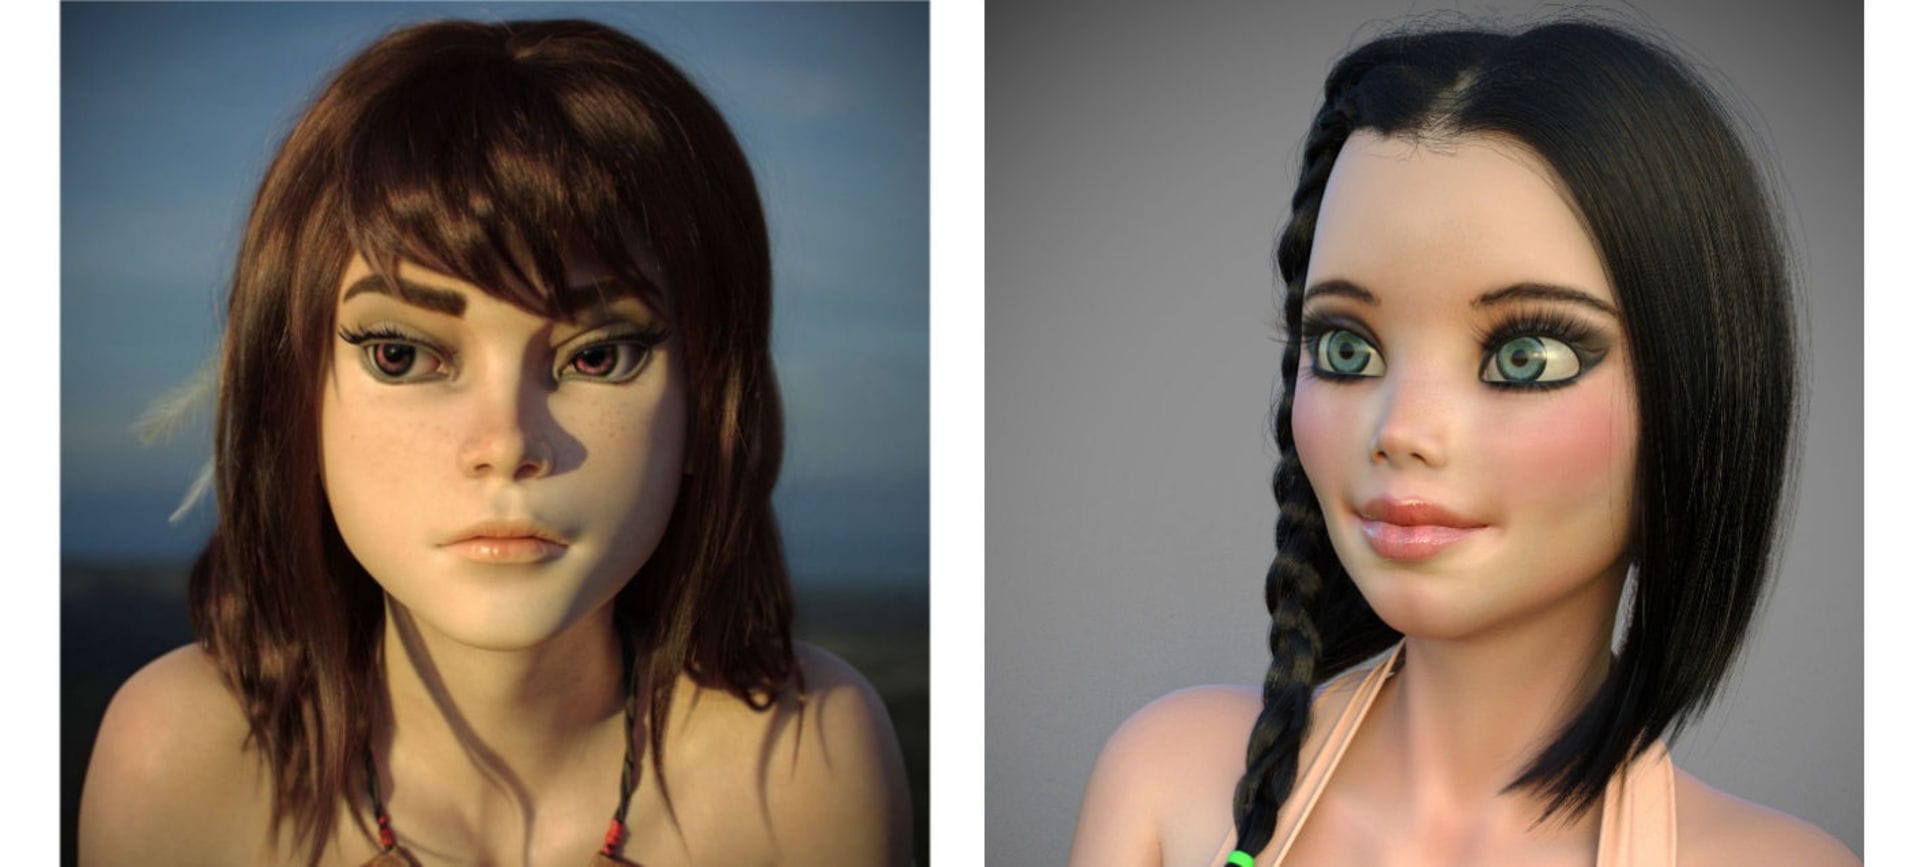
What were your first impressions of the new V-Ray Hair Material in V-Ray Next for Maya?
When I saw the first render with the glint effect from the new beta, my jaw dropped! I ran around the room, screaming with admiration and calling my relatives to look at it. Everything is simple and intuitive, and Chaos Group’s wonderful documentation helped me understand how to make this cool shader work.
How do you adjust the material to match the look you’re going for?
There is nothing complicated in the shader. You only need to understand how softness works together with glossiness, melanin and dye color, and a small amount of diffuse.
Of course, it’s important to observe the real world. Before I get started, I collect a lot of reference images to study the behavior of hair and fur in different conditions.
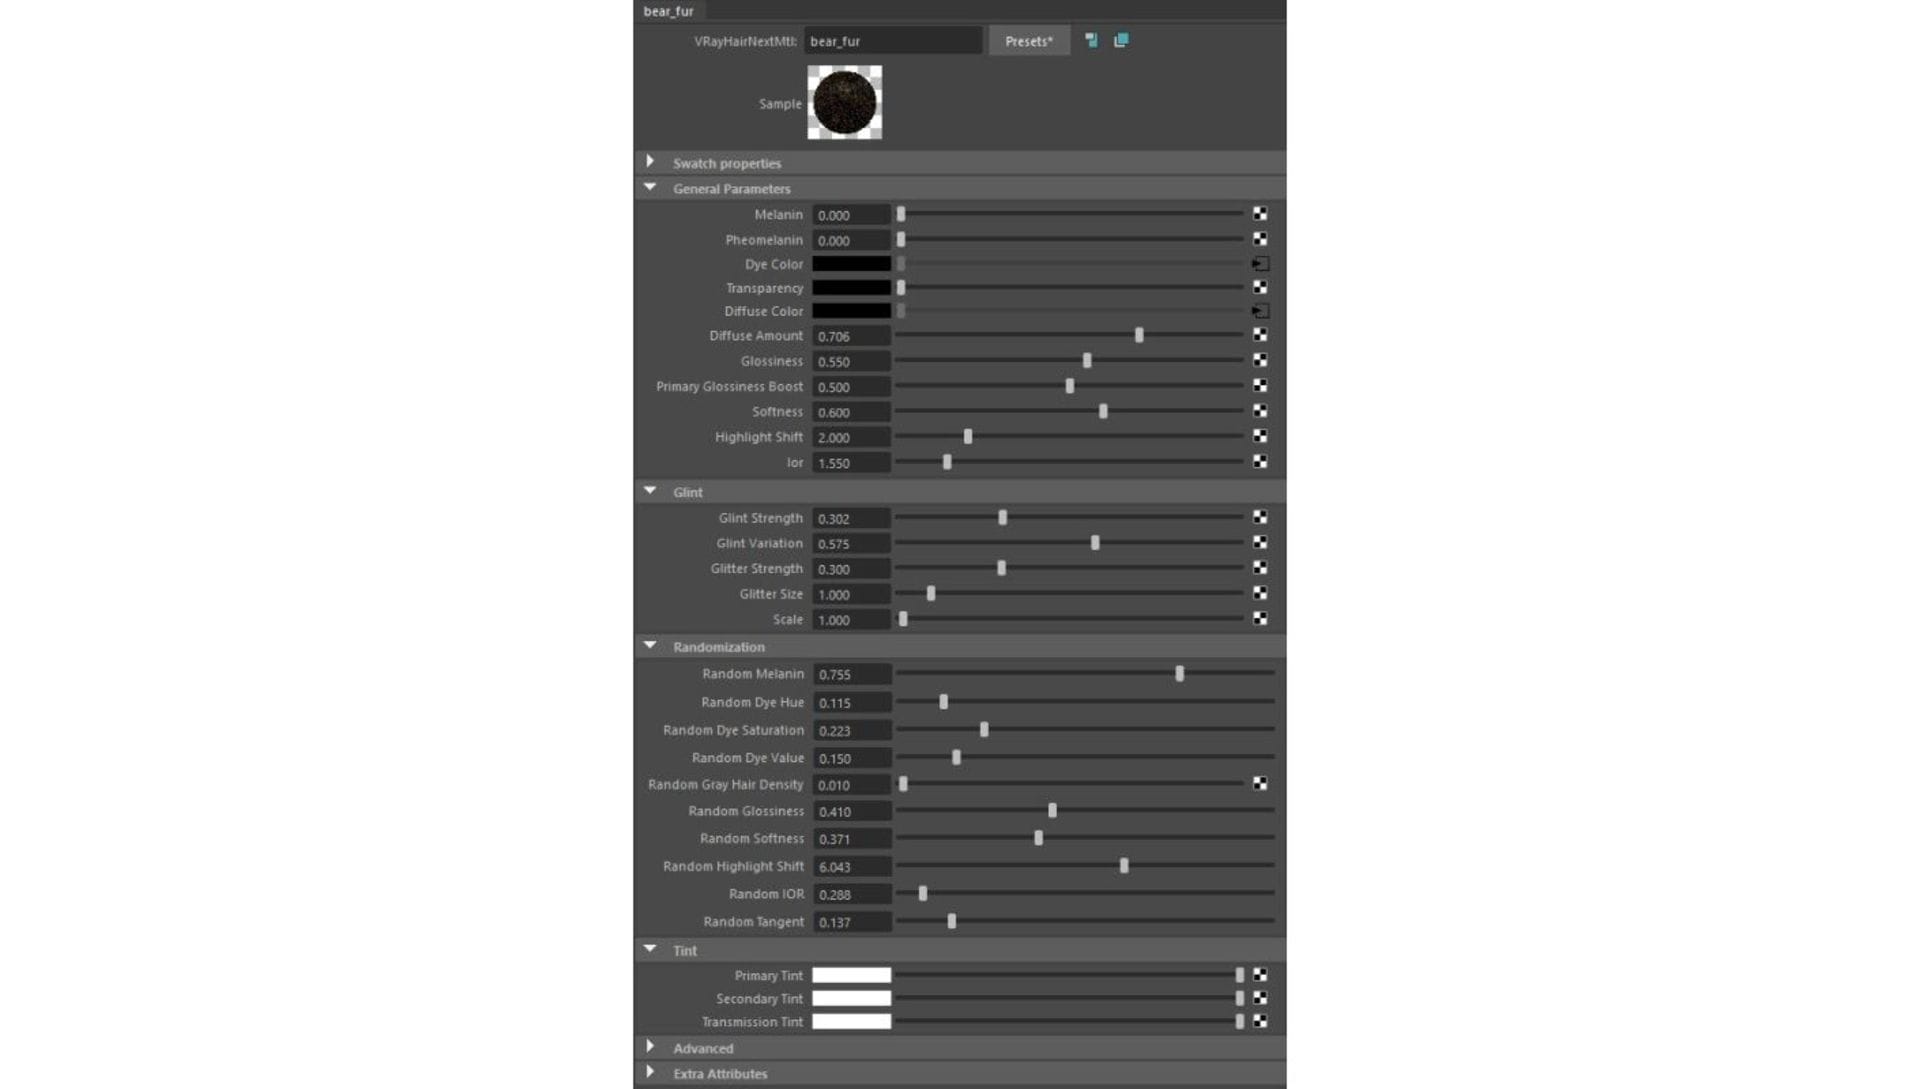
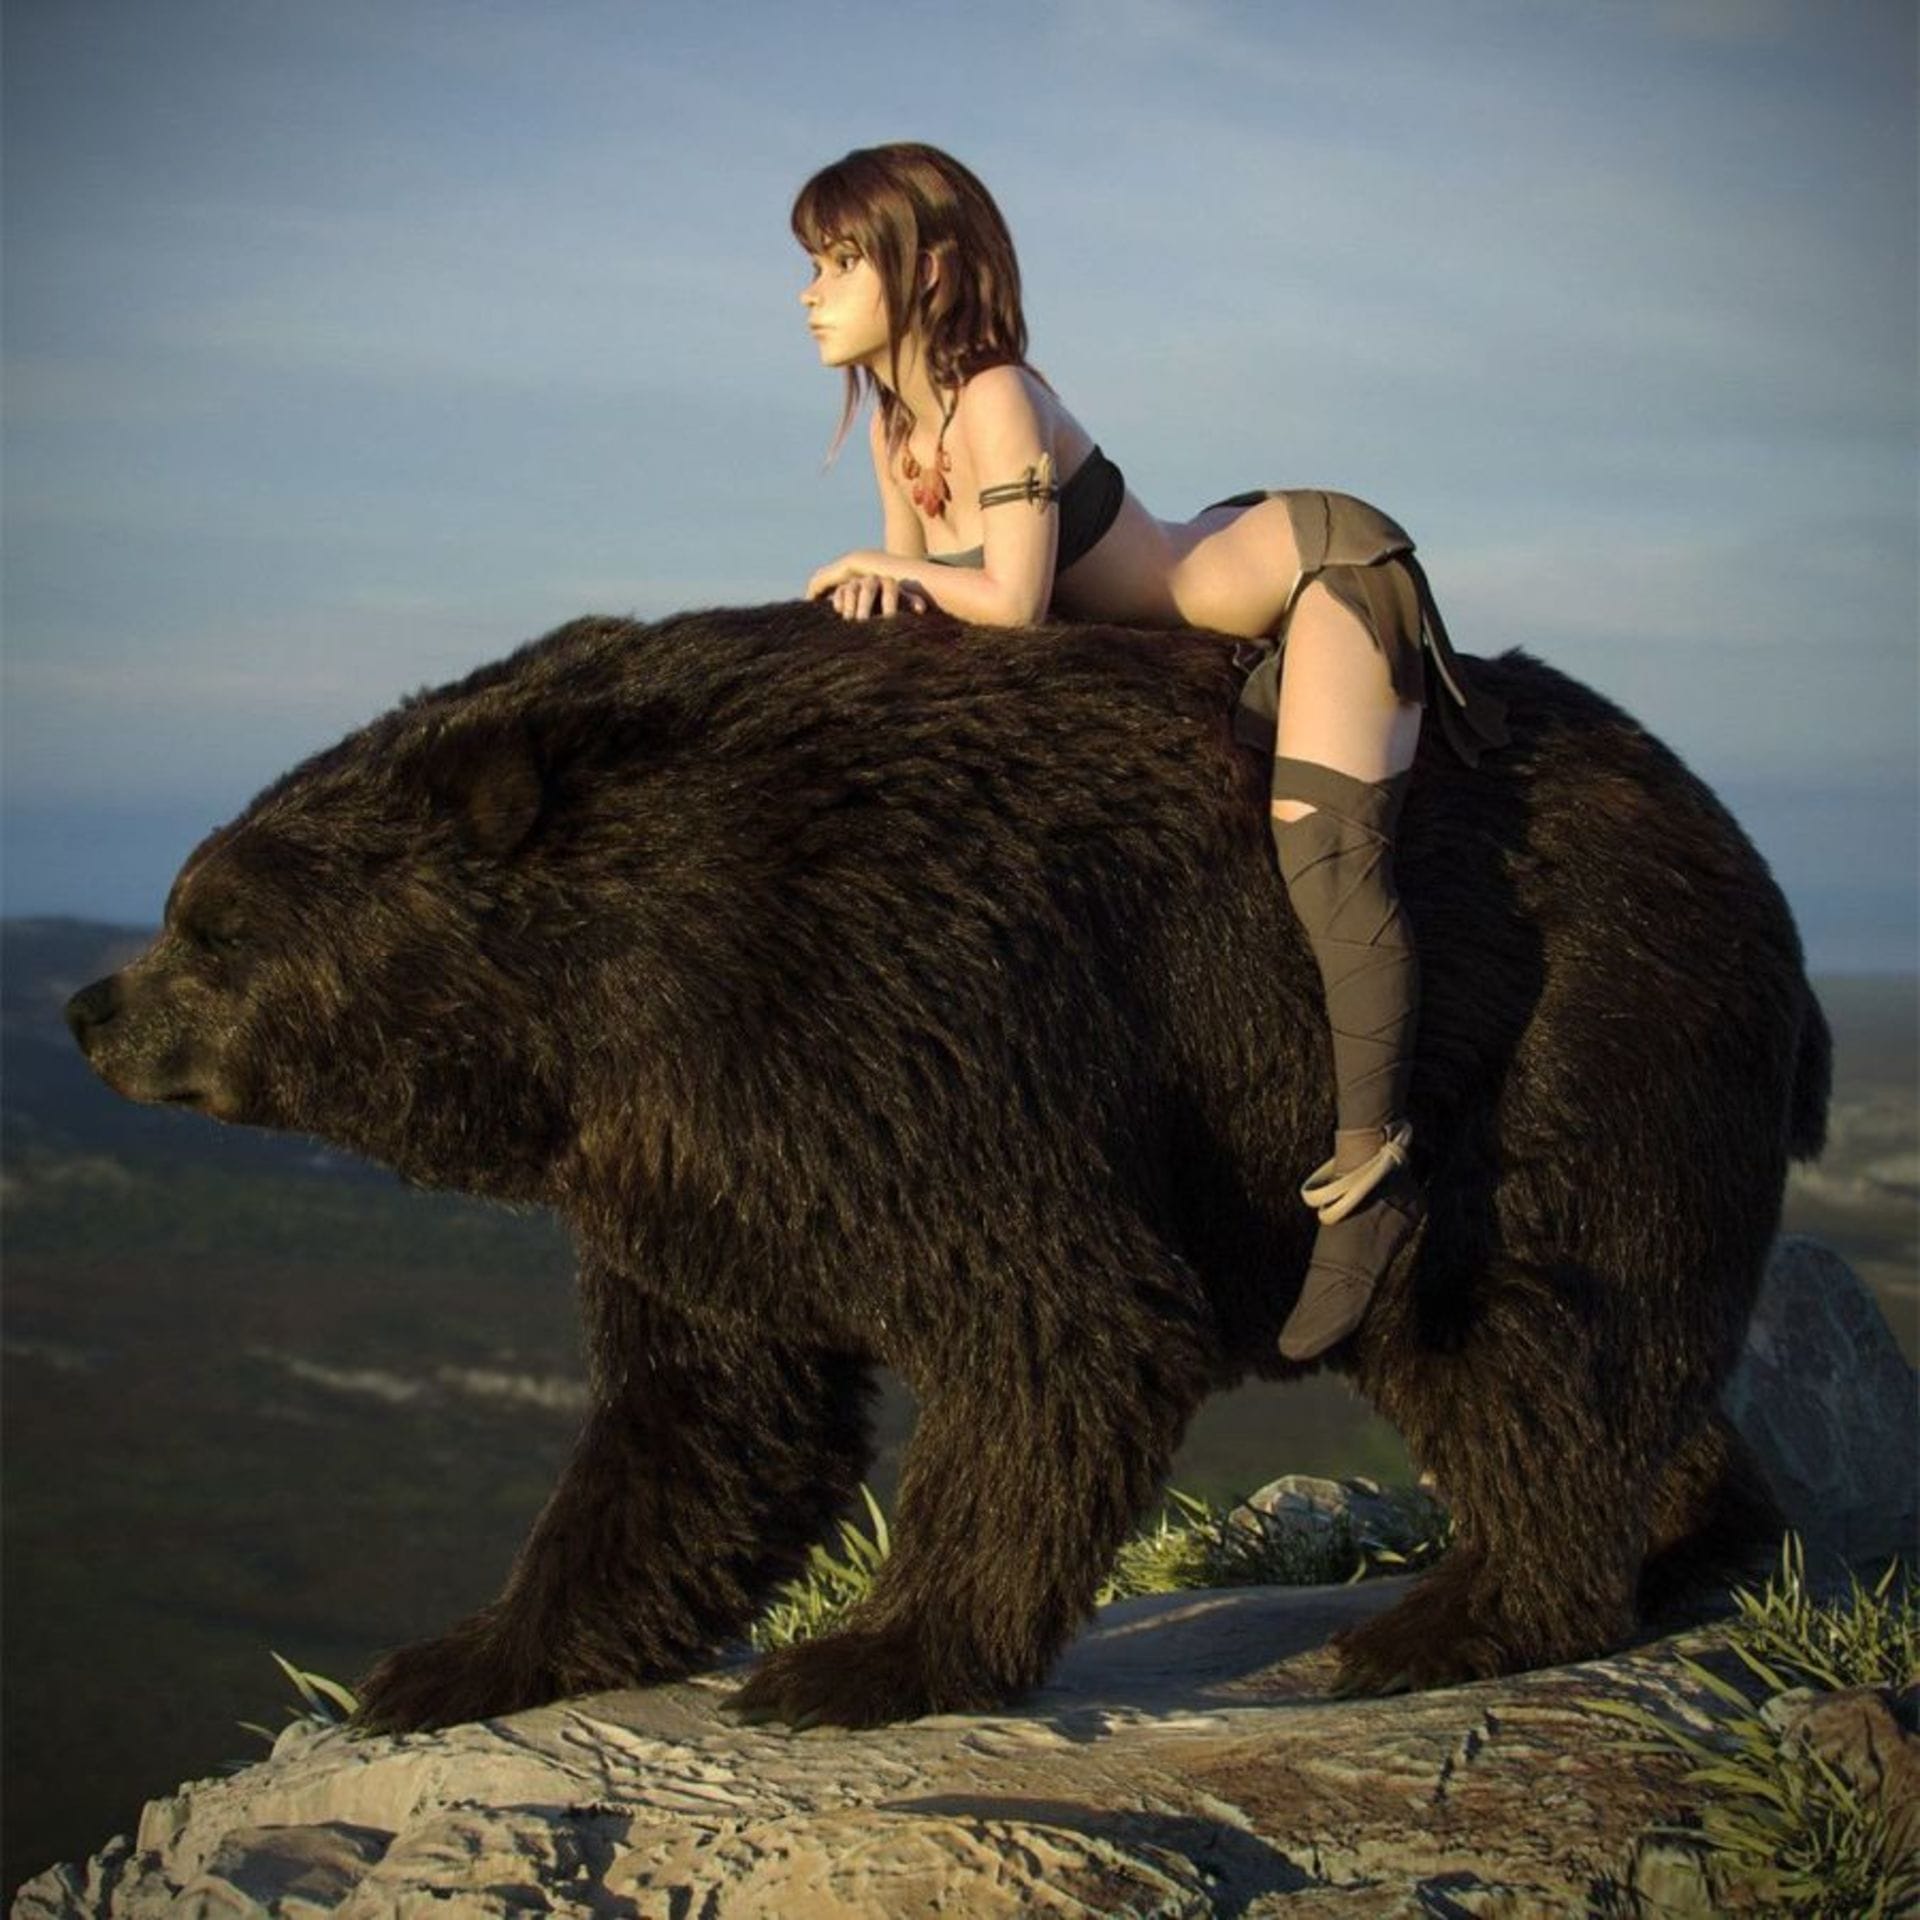
This is the shader I used to create bear fur shader in V-Ray Next for Maya beta 2, working with the awesome glint effect.
What do you think of V-Ray Cloud?
My first impression was “wow!” Fifty renders at the same time, really quickly, is nothing short of magic.
On a recent project, I created 17 renderers in 4K resolution. Through experimentation, I landed on these presets in V-Ray’s Quick Settings:
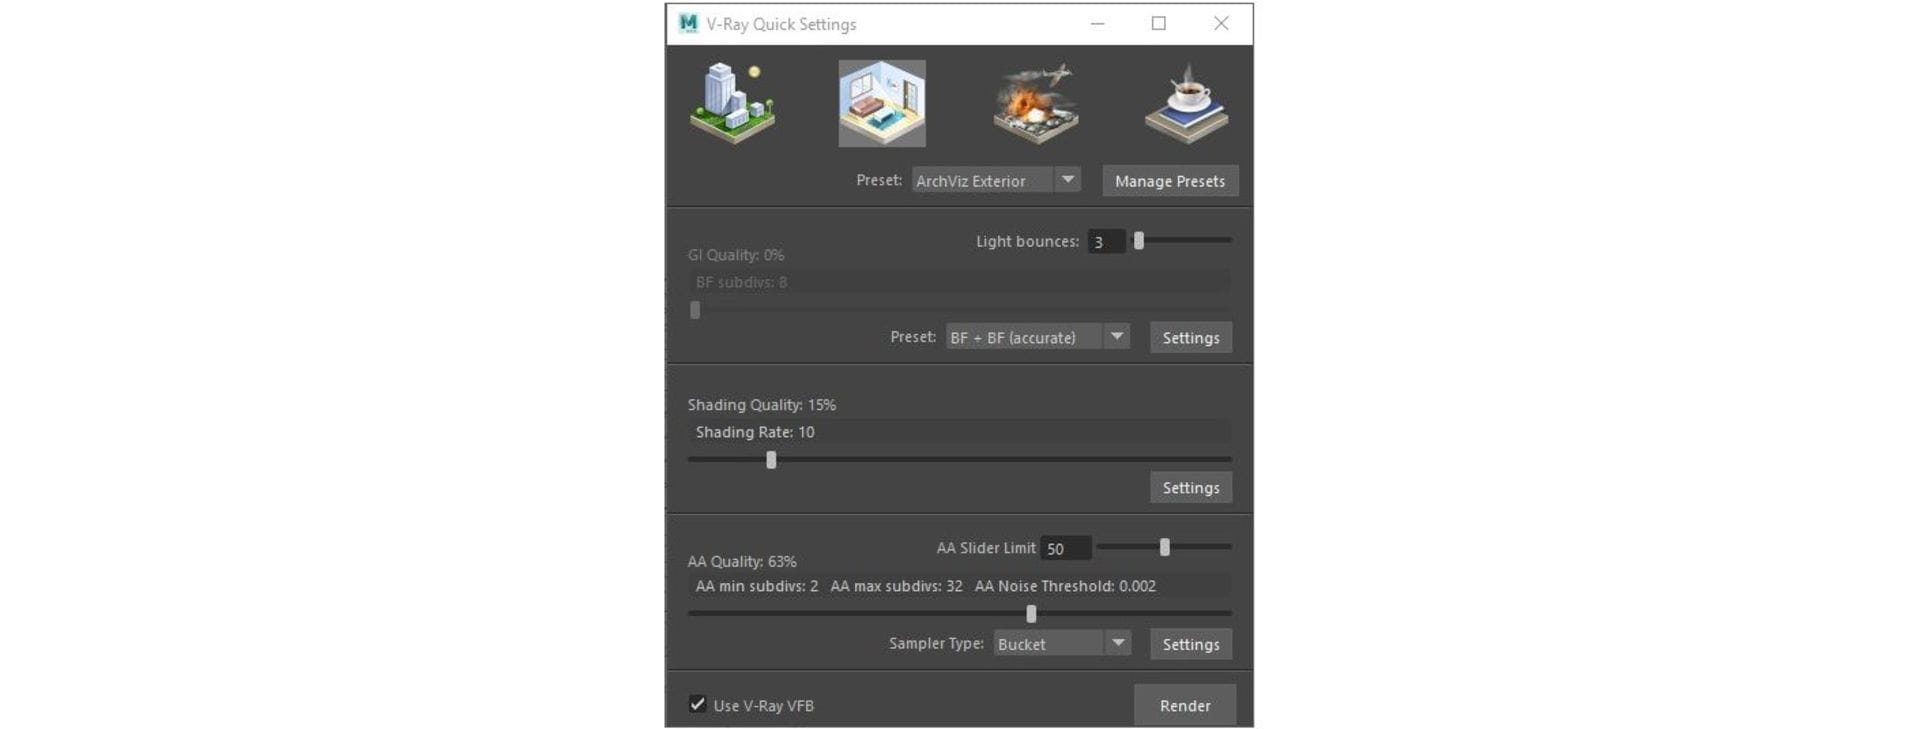
Not the maximum, but enough for my work.
Then I resized the all images to 1K. This is the best way to get high-quality images for Artstation and the web without huge file sizes.
In total, all 17 images were rendered in about 40 - 60 minutes — simultaneously.
How do you typically render, when not using V-Ray Cloud?
Using my Dual Xeon E5 2670/32 threads/2.60Ghz/64 GB RAM on the farm, such a render would have taken much longer. I conducted a test with another image and the render took about five hours, versus 30 minutes with the same settings in V-Ray Cloud.
With V-Ray Cloud I can make art without thinking about the rendering time.
How much time do you think V-Ray Cloud saved you?
If I go from previous tests on my PC where I rendered one picture in about four hours, then this totals 68 hours — or just under three days. With V-Ray Cloud, we’re down to 60 minutes.
Did you use V-Ray Cloud for test renders?
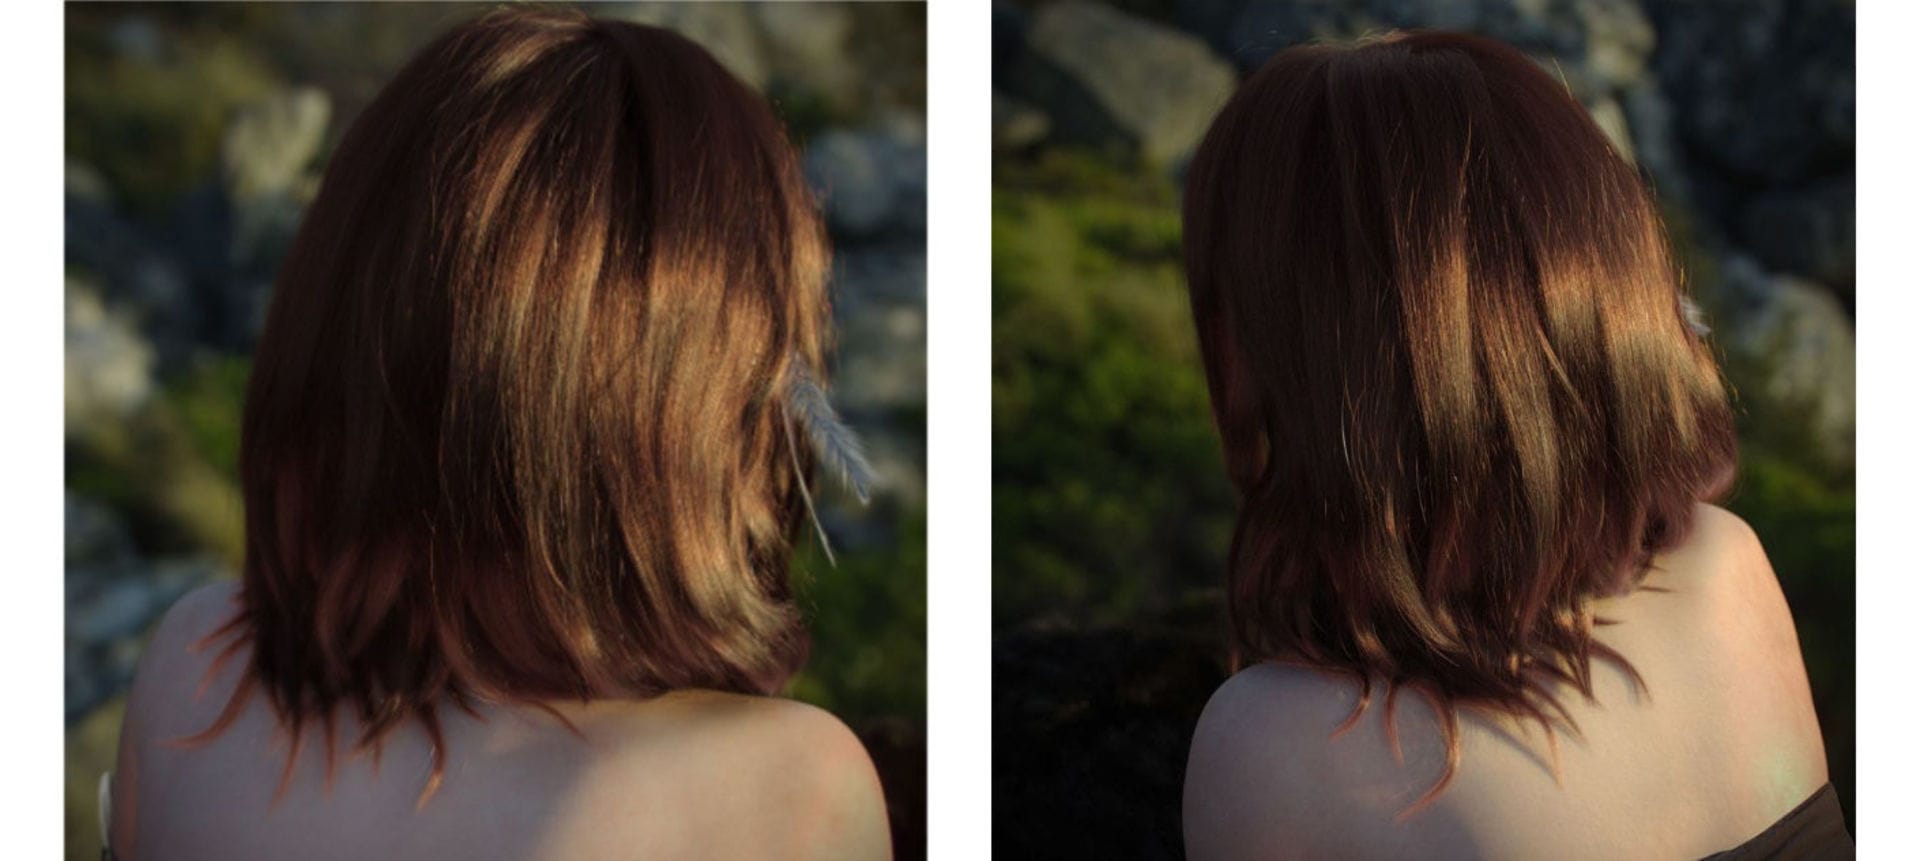
Hair and fur in the IPR can be very slow on my PC, but V-Ray Cloud helped a lot with this. I created test renders with the Shading Rate at 2, and AA subdivs at 1/16, which is the quality I need to get an idea of how the final shot will look. With these settings in V-Ray Cloud, it takes 30 - 60 seconds to render one picture. It's very fast and it speeds up my work. Now, I can make art without thinking about the render time.
And it's still on the CPU. I think Chaos Group will cause a revolution when it adds IPR and GPU!
What are you working on next?
I find it's much more intriguing when artists don't reveal their secrets, so I'll just say that I'm working on several tutorials using V-Ray, V-Ray Cloud and Phoenix FD, along with a few personal projects that will stay hidden until they're ready. Stay tuned!
Check out this interview with Corona Renderer to find out more about Andrew, and take a look at his stunning portfolio.


