Rendering Hair: A Physiological Approach
Rendering hair correctly in computer graphics is a fairly complex problem to solve. Because hair is made up of thousands of translucent and scaly cylinders, it’s a fairly complex surface. This makes it difficult to determine exactly how light interacts as it transmits, reflects and bounces off it. To make it even more challenging, an average head of human hair contains more than 100K hairs, and these hairs are very fine — usually thinner than a single pixel.
While previous hair shaders have been a good approximation, it can be difficult to get hair color and reflectivity just right. In V-Ray Next, with research based on the paper A Practical and Controllable Hair and Fur Model for Production Path Tracing, we’ve created a new shader that renders hair in a more physiological way. Biologically speaking, hair color is determined by its amount of melanin. So instead of setting an arbitrary color value, we’ve created a simple melanin slider to control hair color realistically. The same goes for shininess. The new settings are now based on the physiology of real hair. While this may be unfamiliar at first, with a little understanding of the biology of hair, the new shader is much easier to control and much more predictable.
Hair color is all about melanin
Your hair color is determined by its amount of melanin. The more melanin you have, the darker your hair will be. Blonde hair has very little melanin, while black hair has the most. But there are actually two types of melanin that control your hair color: eumelanin and pheomelanin. The ratio of these two types of melanin determine how red your hair is. If you have more pheomelanin, your hair will be more red.
In the new V-Ray hair material you can set hair color with just a single slider control. A value of 0 is white hair, and a value of 1 is black hair. All other hair colors fall somewhere in between. To make red hair, first set the melanin to the desired darkness, then adjust the pheomelanin slider until you reach the desired redness. This sets the ratio of eumelanin to pheomelanin, with 0 being all eumelanin and 1 being all pheomelanin.
Melanin amount
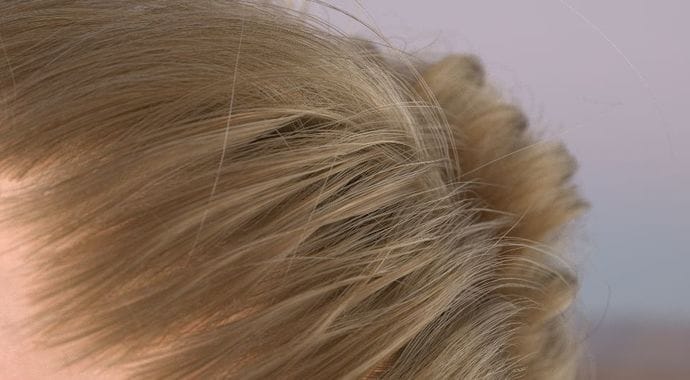
Melanin 0.25
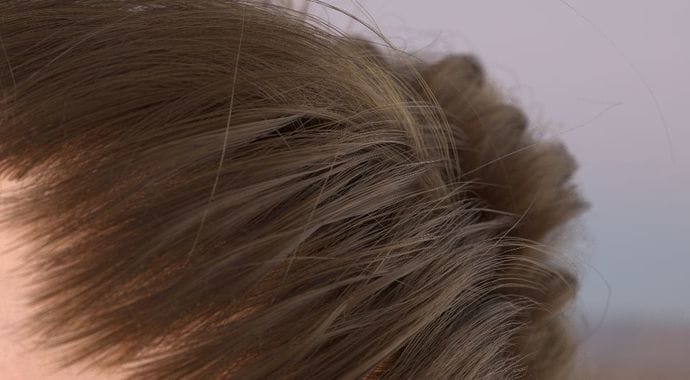
Melanin 0.45
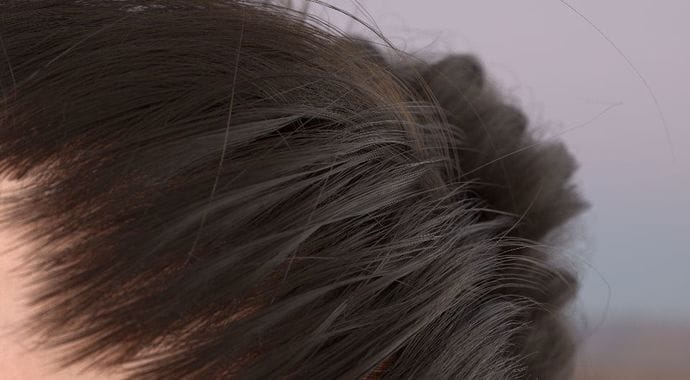
Melanin 0.65
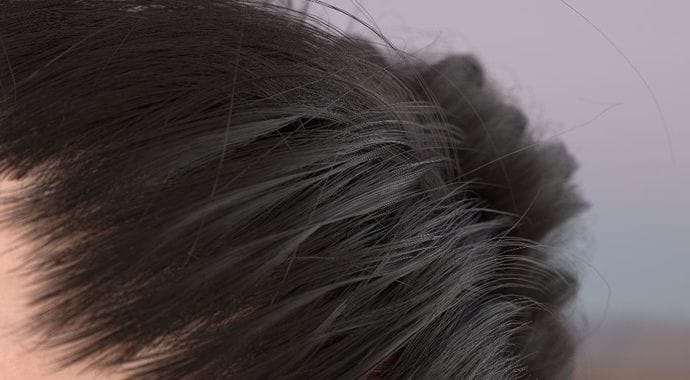
Melanin 0.85
Melanin with different pheomelanin ratios

Melanin 0.45, pheomelanin 0
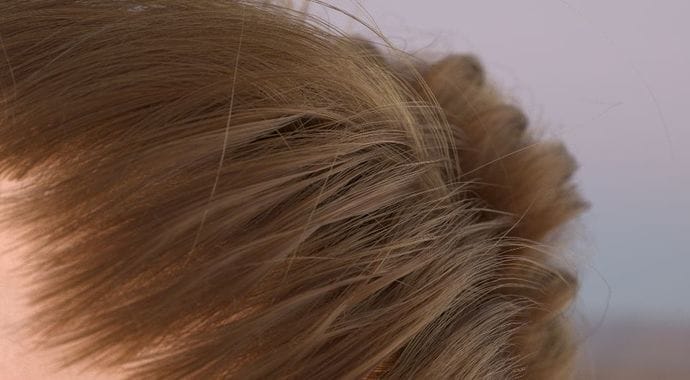
Melanin 0.45, pheomelanin 0.65
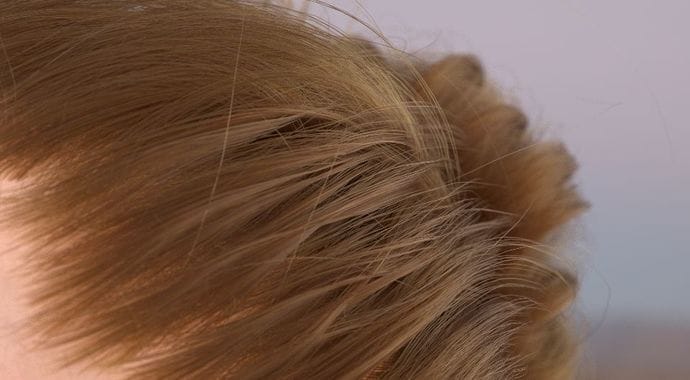
Melanin 0.45, pheomelanin 0.95

Melanin 0.65, pheomelanin 0
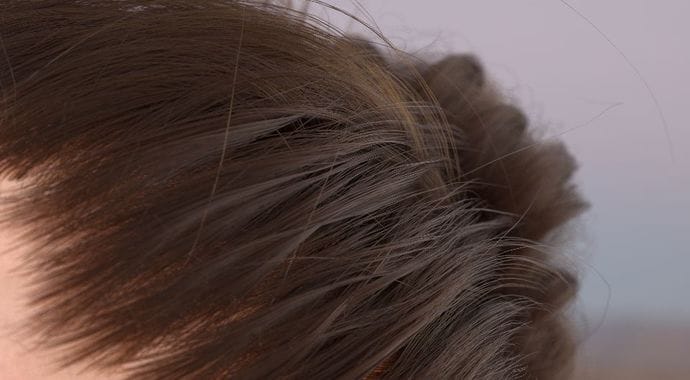
Melanin 0.65, pheomelanin 0.65
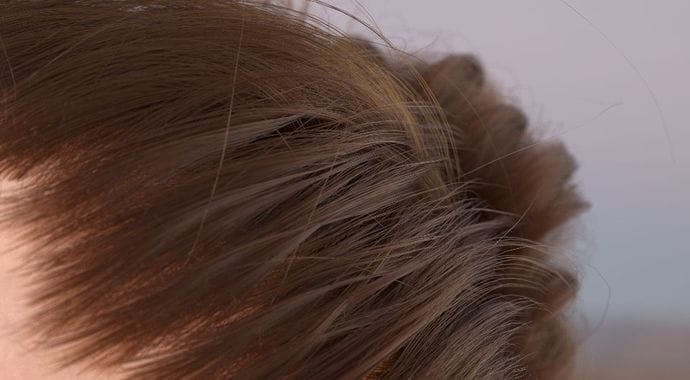
Melanin 0.65, pheomelanin 0.95
What about dyed hair?
Of course, not everyone keeps their natural hair color. People often use hair dye, which can be just about any color. To help with this we’ve added hair dye controls to the new hair shader. And to use it correctly, you just need to think like a hair stylist. For example, to dye hair blue, you first have to remove the color by bleaching it white. That way the color will show up. To do this in the material, you simply turn the melanin levels down to near 0 and then add dye color as needed.

Example of green hair dye with melanin of 0.1

Example of red hair dye with melanin of 0.1
Shininess is all about the hair structure
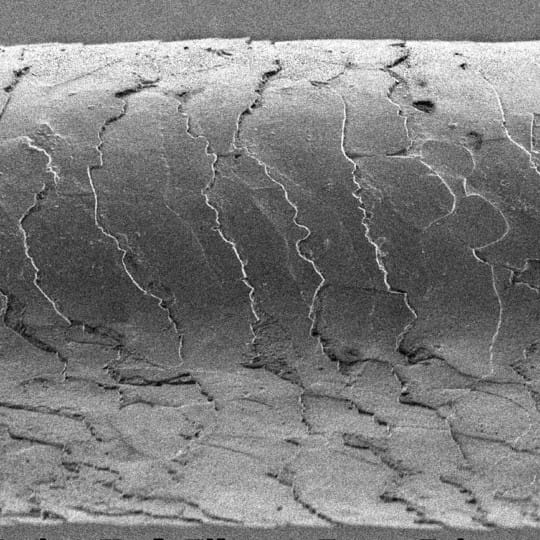
To get hair with the correct shininess, you need to look at the geometry of hair. Generally, when most people think of hair, they think of it as a smooth cylinder. But when you look at hair under a microscope, you’ll notice it’s actually made up of up tiny scales that spread away from the root of the hair. Because of this shape, hair reflections actually have a direction to them.
The general glossiness of hair consists of two specular lobes. In previous hair shaders, V-Ray used separate controls for primary and secondary speculars. While this may have given you more control over each specular lobe, it also made it more challenging to find the right balance. In the new hair shader, the two speculars are linked in a more natural way and the general glossiness controls both lobes together. To enhance the primary glossiness, just raise the primary glossiness boost to get that extra shine.
Different glossiness levels

Glossiness 0.35

Glossiness 0.50

Glossiness 0.75
Glossiness with different boosts

Glossiness 0.45 with Boost 0.10

Glossiness 0.45 with Boost 0.50

Glossiness 0.45 with Boost 0.75
The highlight itself will follow along the length of the hair. But the highlight can also wrap around individual strands. This can be controlled through the softness parameter. The higher the softness, the more the highlight will just wrap around individual hairs and give it a smoother look. Lower softness values will make the hair look crisper.
Example of different softness

Softness at 0.10

Softness at 0.50

Softness at 0.80
Looking back at the microscopic image of the hair, you’ll notice that the scales on each strand face away from the root of the hair. If the scales are very flat, the highlights will appear more linear. If the scales are more angular, the highlights will bounce back more, shifting them slightly. This effect is controlled by the highlight shift parameter. The higher the value, the more the highlight will shift away from the root of the hair.
Examples of different highlight shifts
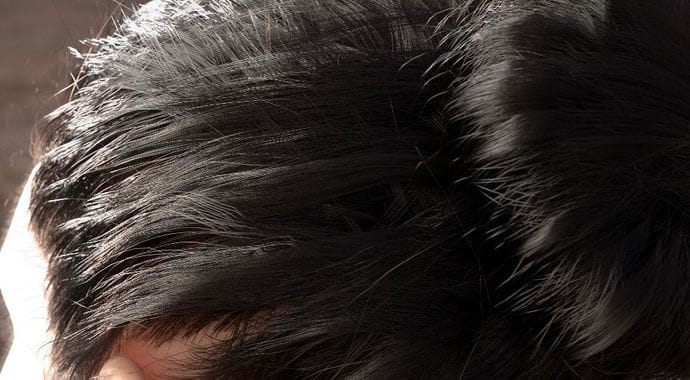
Highlight shift 0
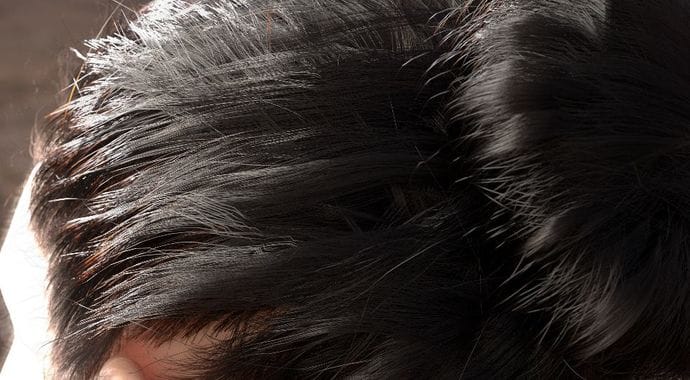
Highlight shift 3
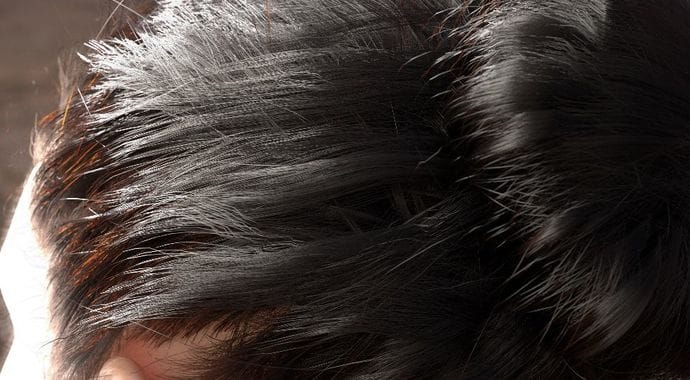
Highlight shift 8
Not every hair is equal
As you know, the shininess and color for each hair is not identical. Therefore, details such as texture maps can be introduced to control different colors. Also, many hairs right next to each other can have variations in their colors and highlights. This is where randomization can help.
Randomization parameters allow you to introduce variation between each individual hair, allowing for a certain shift in the amount of melanin, softness, glossiness and dye color. This will give you a much more realistic representation of the color and shine of the hair.
Example of random melanin color
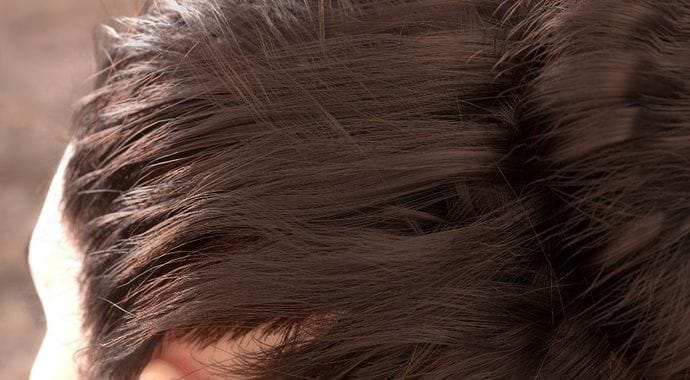
Melanin randomization 0.0
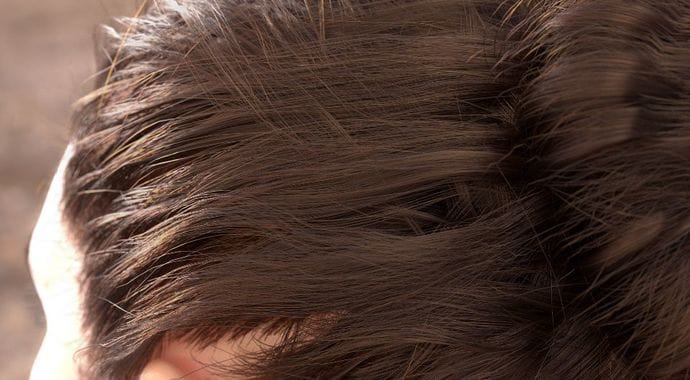
Melanin randomization 0.25
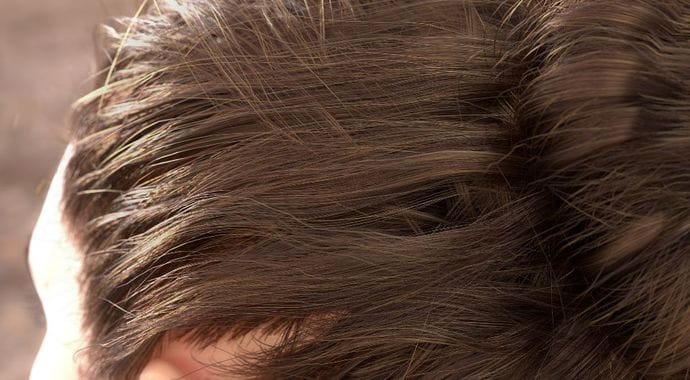
Melanin randomization 0.50
Examples of random glossiness

Glossiness randomized by 0

Glossiness randomized by 0.25
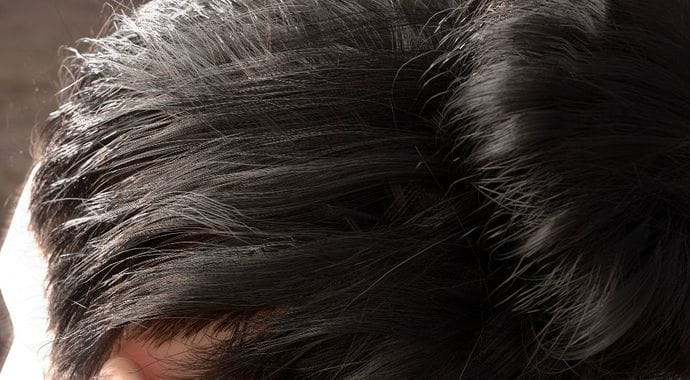
Glossiness randomized by 0.50
Faster look development for hair with simpler settings and fast IPR with V-Ray GPU
With the fast feedback of V-Ray GPU in IPR, in combination with the new hair shader which is compatible with V-Ray GPU, you can render natural looking hair very quickly in V-Ray Next. The following image was rendered using the original scene from Ian Spriggs of his protrait of his friend Tony. After converting the shaders to the new hair shader from V-Ray Next, we were able to generate the look developement of the hair in a very short period of time.
Here is a video that shows you the process of using the shader for look developement of the scene:
The new hair shader is currently available in the V-Ray Next for 3ds Max Beta and can be rendered in both V-Ray and V-Ray GPU. Join the beta to give it a try.
Reference material
[1] Chiang et al. "A Practical and Controllable Hair and Fur Model for Production Path Tracing" - 2016
(https://benedikt-bitterli.me/pchfm/)
[2] Pharr "THE IMPLEMENTATION OF A HAIR SCATTERING MODEL" - 2016
(http://www.pbrt.org/hair.pdf)
[3] d'Eon et al. "An Energy-Conserving Hair Reflectance Model" - 2011
(http://www.eugenedeon.com/project/an-energy-conserving-hair-reflectance-model/)
[4] d'Eon et al. "An Energy-Conserving Hair Reflectance Model" post publication review - 2011
(https://publons.com/publon/2803/)
[5] d'Eon et al. "Importance Sampling for Physically-Based Hair Fiber Models" - 2013
(https://cg.ivd.kit.edu/publications/pubhanika/2013_hairbrief.pdf)
[6] d'Eon et al. "A Fiber Scattering Model with Non-Separable Lobes - Supplemental Report" - 2014
(http://www.eugenedeon.com/project/a-fiber-scattering-model-with-non-separable-lobes/)
[7] Marschner et al. "Light Scattering from Human Hair Fibers" - 2003
(http://www.graphics.stanford.edu/papers/hair/hair-sg03final.pdf)
[8] Zinke et al. "Light Scattering from Filaments" - 2007
(http://cg.cs.uni-bonn.de/project-pages/hairmodeling/documents/BFSDF_preprint_with_copyright_notice.pdf)
[9] Zinke (thesis) "Photo-Realistic Rendering of Fiber Assemblies" - 2008
(http://cg.cs.uni-bonn.de/en/publications/paper-details/Zinke2008a/)
[10] Jakob (thesis) "Light Transport On Path-Space Manifolds" - 2012
(https://ecommons.cornell.edu/handle/1813/34189)
[11] Yan et al. "Physically-Accurate Fur Reflectance: Modeling, Measurement and Rendering" - 2015
(http://people.eecs.berkeley.edu/~lingqi/publications/paper_fur.pdf)
[12] Yan et al. "An Efficient and Practical Near and Far Field Fur Reflectance Model" - 2017
(http://people.eecs.berkeley.edu/~lingqi/publications/paper_fur2.pdf)


